
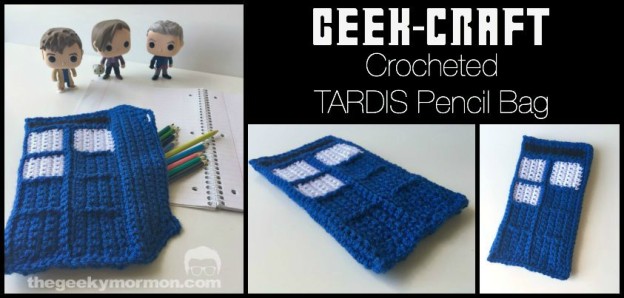
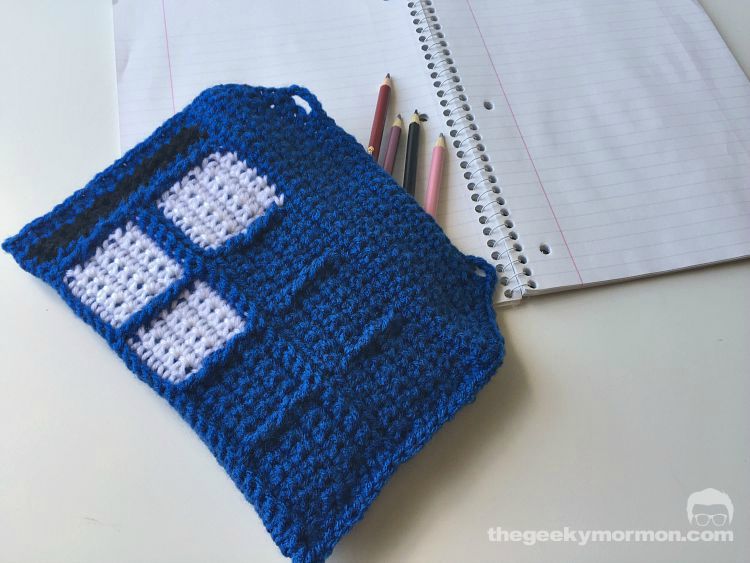
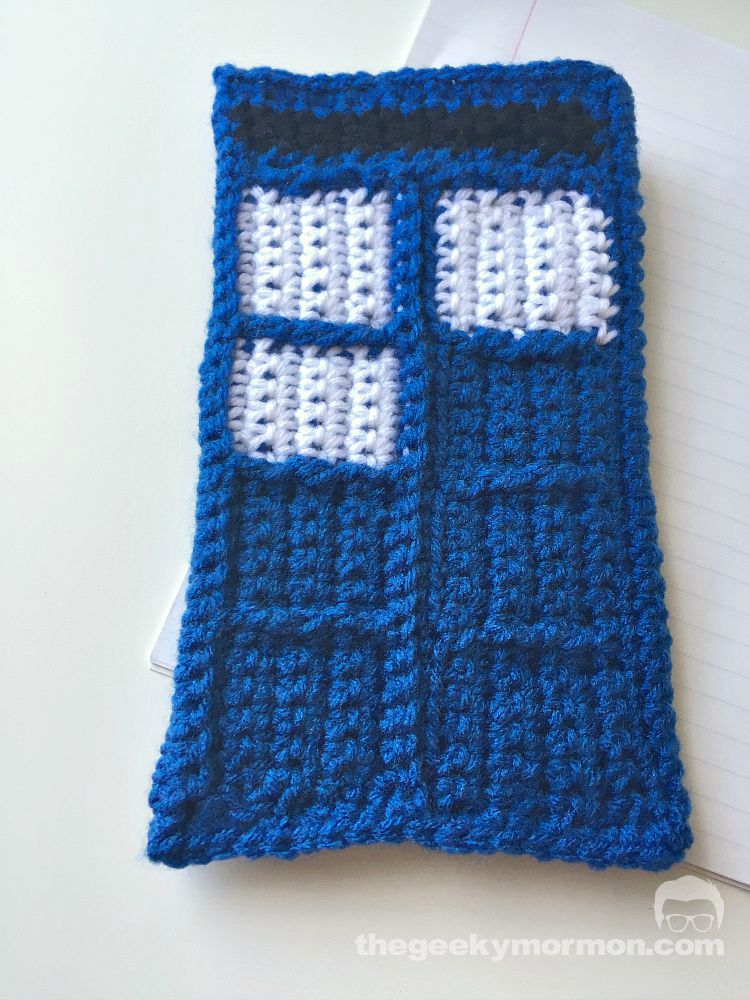
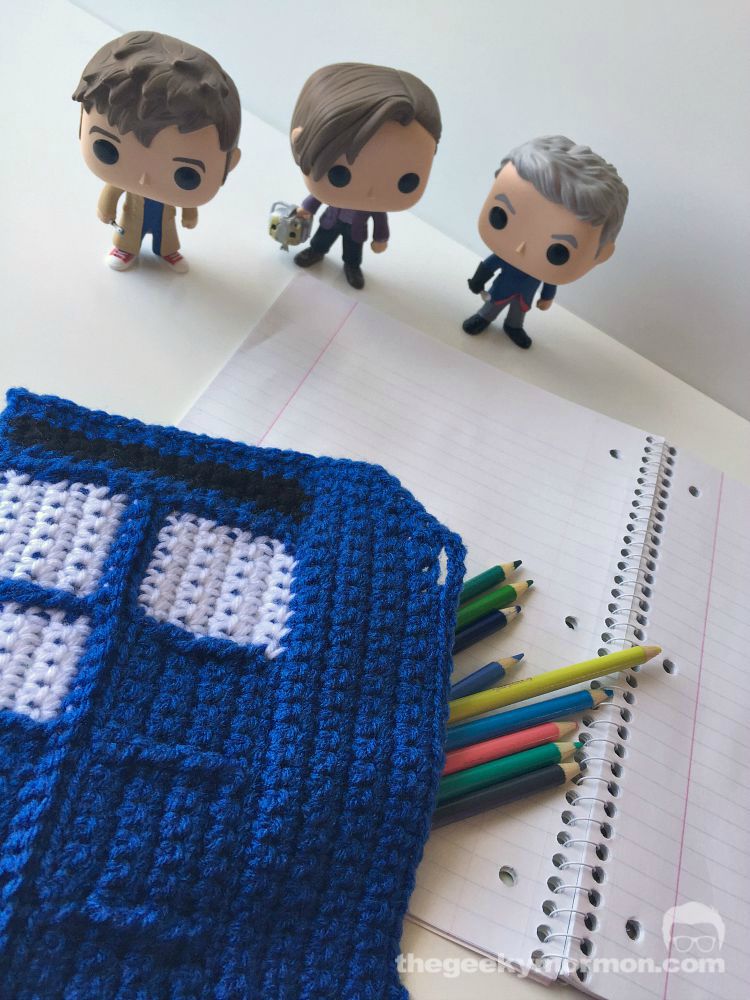
It has been quite a while since I last shared a geek-craft here on The Geeky Mormon. I thought it was probably about time I shared another and hopefully I can make this a more regular thing. Today I am sharing the pattern for a crocheted TARDIS pencil bag. Last year I shared a Ninja Turtle pencil bag as my very first geek-craft and since school it is back to school time again I thought another pencil bag would be a good idea.
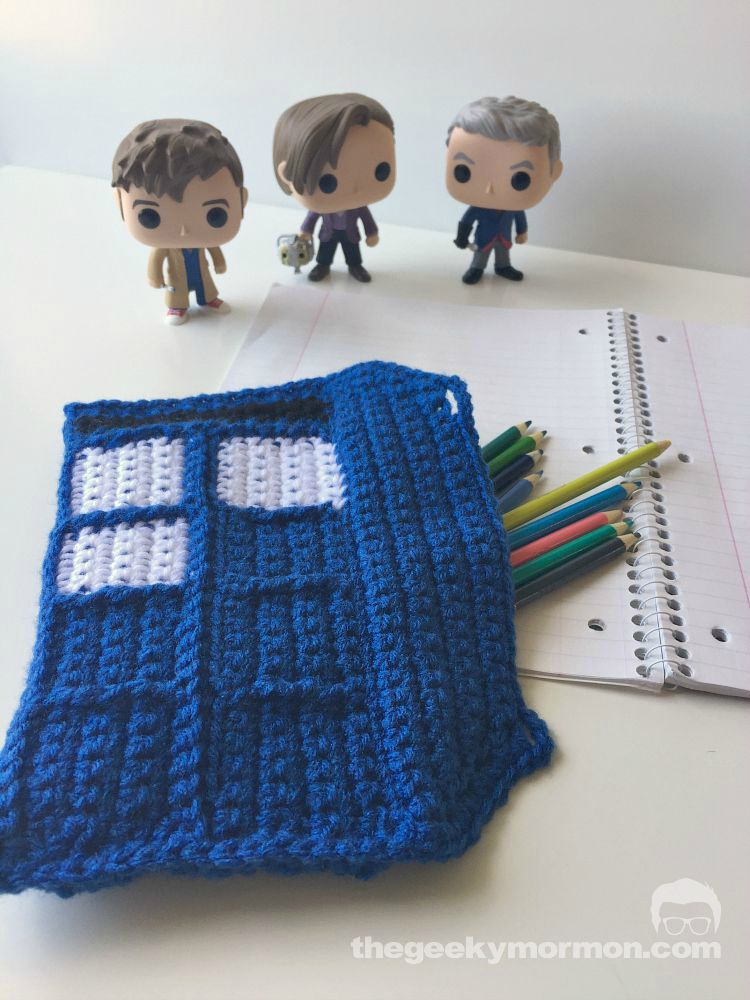
The pattern is similar to the Ninja Turtle bag, this year on my blog I have shared a basic pencil bag pattern based on the Ninja Turtle as well as a couple of other variations. When I was trying to think of another geeky themed bag the TARDIS seemed like an obvious choice since it is already a rectangular shape. The tricky part was trying to add the texture to the doors and windows so that it looked like the TARDIS.
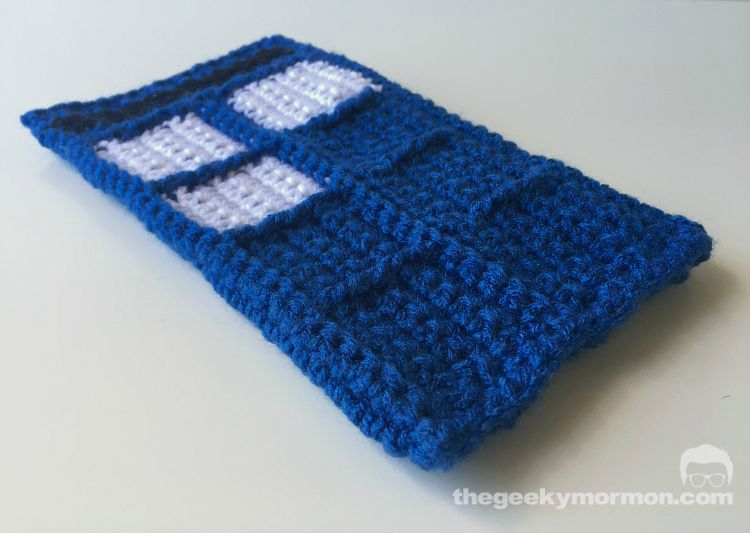
I used a combination of front loop only (flo), back look only (blo), front post (fpsc), and back post (bpsc) to create the texture. I also used a few color changes to show the windows and the signs. If you want to you could embroider the words POLICE BOX on the black strip and window panes on the windows so make it look even more like the TARDIS.
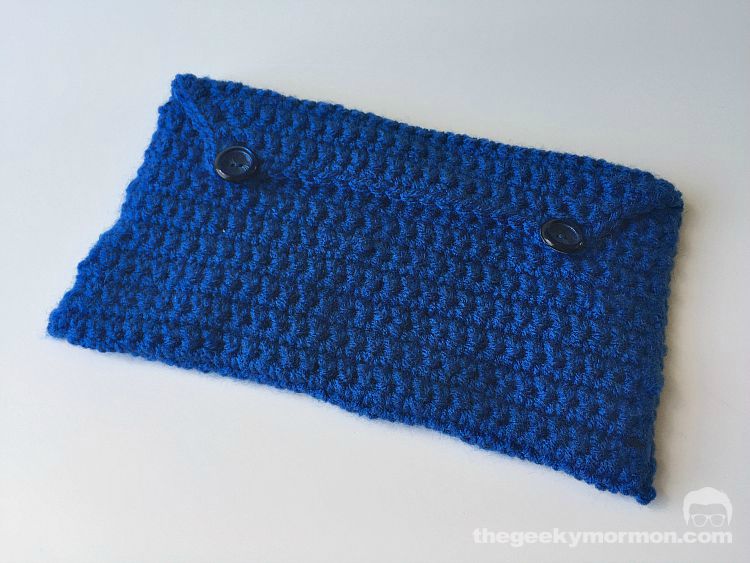
The back has a simple button flap closure just like the Ninja Turtle bag.
TARDIS Pencil Bag
You will need:
- worsted weight yarn in blue, white, and black (I used Red Heart Super Saver in Blue Suede, White and Black)
- H crochet hook
- 2 buttons- 3/4 inch-1 inch
- yarn needle
- sewing needle
- sewing thread
- scissors
*when changing color always change color on the last step of the previous stitch, in other words begin your single crochet as normal by inserting hook in the stitch, pull up a loop, then yarn over with your new color and pull through
*when working with another color, carry the blue yarn by crocheting over it
*make sure to always pull your yarn to the wrong side when you change color so that your color changes look neat
with blue yarn ch 31
Row 1: sc in second ch from the hook and each ch across (30 sc)
Row 2-19: ch 1, turn, sc in each stitch across (30 sc)
Row 20: (this is a right side row) ch 1, turn, 1 sc, 5 sc blo, 1 sc, 5 sc blo, 1 sc, change to white yarn, 5 sc blo, change to blue, 1 sc, change to white, 6 sc blo, change to blue, 2 sc, change to black, 2 sc, change to blue, 1 sc (30 sc- 17 blue, 11 white, 2 black)
Row 21: (wrong side row) ch 1, turn, 1 sc, change to black, 2 sc, change to blue, 1 sc, 1 bpsc, change to white, 6 sc, change to blue, 1 bpsc, change to white, 5 sc, change to blue, 1 bpsc, 5 sc, 1 bpsc, 5 sc, 1 bpsc (30 sc- 17 blue, 11 white, 2 black)
Row 22: ch 1, turn, 1 fpsc, 5 sc, 1 fpsc, 5 sc, 1 fpsc, change to white yarn, 5 sc, change to blue, 1 fpsc, change to white, 6 sc, change to blue, 1 fpsc, 1 sc, change to black, 2 sc, change to blue, 1 sc (30 sc- 17 blue, 11 white, 2 black)
Row 23: repeat row 21
Row 24: repeat row 22
Row 25: repeat row 21
Row 26: repeat row 22
Row 27: ch 1, turn, 1 sc, change to black, 2 sc, change to blue, 1 sc, 1 bpsc, 25 sc blo (30 sc- 2 black 28 white)
Row 28: ch 1, turn, 25 sc blo, 1 fpsc, 1 sc, change to black, 2 sc, change to blue, 1 sc (30 sc- 2 black 28 white)
Row 29: ch 1, turn, 1 sc, change to black, 2 sc, change to blue, 1 sc, 1 sc blo, change to white, 6 sc flo, change to blue, 1 sc, 5 sc flo, 1 sc, 5 sc flo, 1 sc, 5 sc flo, 1 sc (30 sc- 22 blue, 6 white, 2 black)
Row 30: ch 1, turn, 1 fpsc, 5 sc, 1 fpsc, 5 sc, 1 fpsc, 5 sc, 1 fpsc, change to white, 6 sc, change to blue, 1 fpsc, 1 sc, change to black, 2 sc, change to blue, 1 sc (30 sc- 22 blue, 6 white, 2 black)
Row 31: ch 1, turn, 1 sc, change to black, 2 sc, change to blue, 1 sc, 1 bpsc, change to white, 6 sc, change to blue, 1 bpsc, 5 sc, 1 bpsc, 5 sc, 1 bpsc, 5 sc, 1 bpsc (30 sc- 17 blue, 11 white, 2 black)
Row 32: repeat row 30
Row 33: repeat row 31
Row 34: repeat row 30
Row 35: repeat row 31
Row 36: ch 1, turn, 26 sc flo, 4 sc (30 sc)
Row 37-38: ch 1, turn, sc in each stitch across (30 sc)
Row 39: ch 1, turn, sc dec, 26 sc, sc dec (28 sc)
Row 40: ch 1, turn, sc dec, 24 sc, sc dec (26 sc)
Row 41: ch 1, turn, sc dec, 22 sc, sc dec (24 sc)
Row 42: ch 1, turn, sc dec, 20 sc, sc dec (22 sc)
Row 43: ch 1, turn, sc dec, 18 sc, sc dec (20 sc)
Finish off, You should now have a rectangle that has one end that is slightly angled on each corner, that is the flap. Half of your rectangle will be plain and half will have the TARDIS design. The plain section is the back and the TARDIS side is the front.
Fold your rectangle so that wrong sides are together and 18 rows are on the back and they are matched up with the 18 rows of the front that make up the TARDIS. Starting in one corner, sc evenly up one side of the bag through both layers, continue to sc up the side of the flap, when you reach the corner sc in the corner, ch 4, skip 1, sc in 16, ch 4, skip 1, sc in the other corner of the flap, sc evenly down the side of the flap and the bag being sure to go through both layers of the bag. When you reach the end finish off and weave in ends.
Fold the flap shut to figure out where the buttons need to be placed. Sew them on, sewing thread and a small needle are usually easiest for this. Now you just need to fill up your bag and enjoy.
Check out these other crocheted pencil bag patterns:
Pingback: 10 Crocheted Pencil Case Patterns - Seven Alive