UPDATE: This was a post originally done in September just after the Salt Lake Comic Con. We wanted to update a little bit just in time for Salt Lake Comic Con’s Fan Xperience 2015. FanX started on January 29, giving folks enough time to put something like this together. Trust, having a cool bag like this for the kids is awesome. As far as updates to our original post, we basically changed the name to a perfect sized Swag Bag instead of messenger bag, and updated the featured picture.
If you decide to make this bag for your kids for the upcoming FanX, we would love to see your pictures. Just add them to the comments below, or post them to our Facebook page.
So, here is the original post:
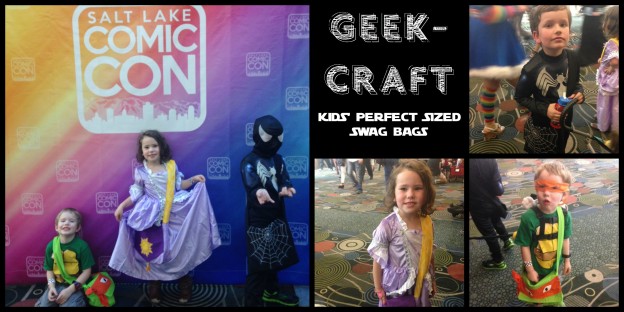
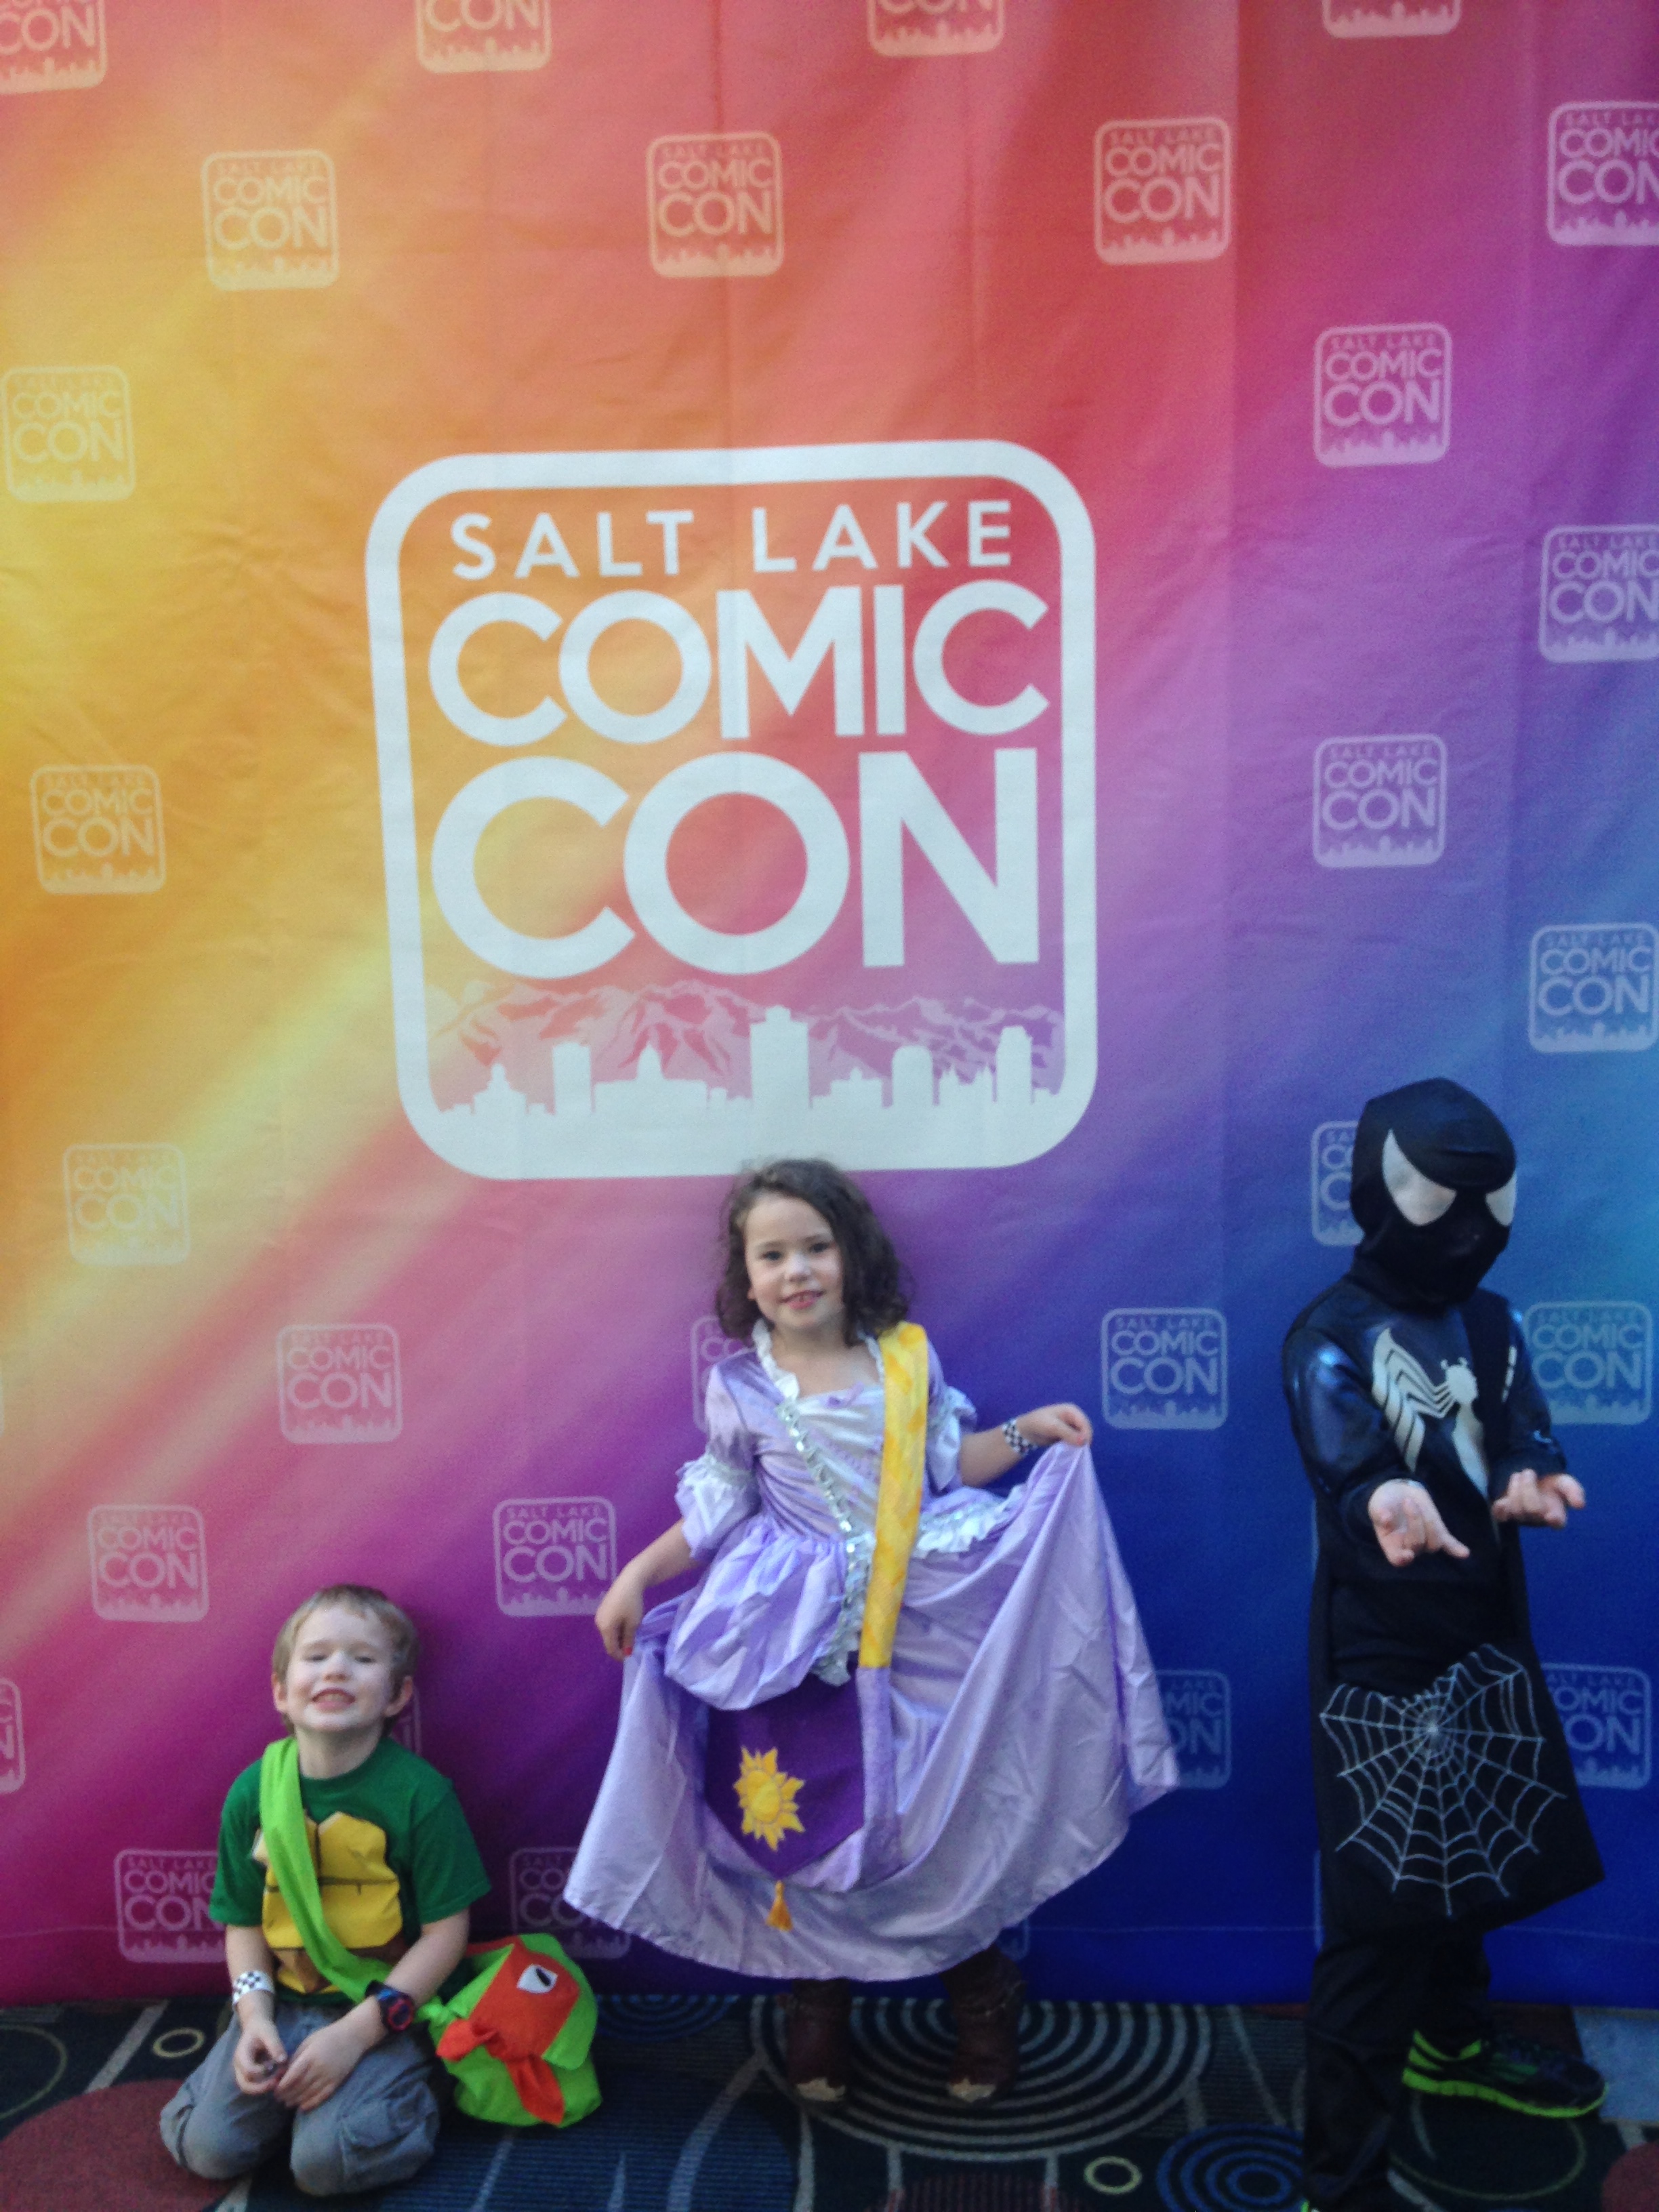
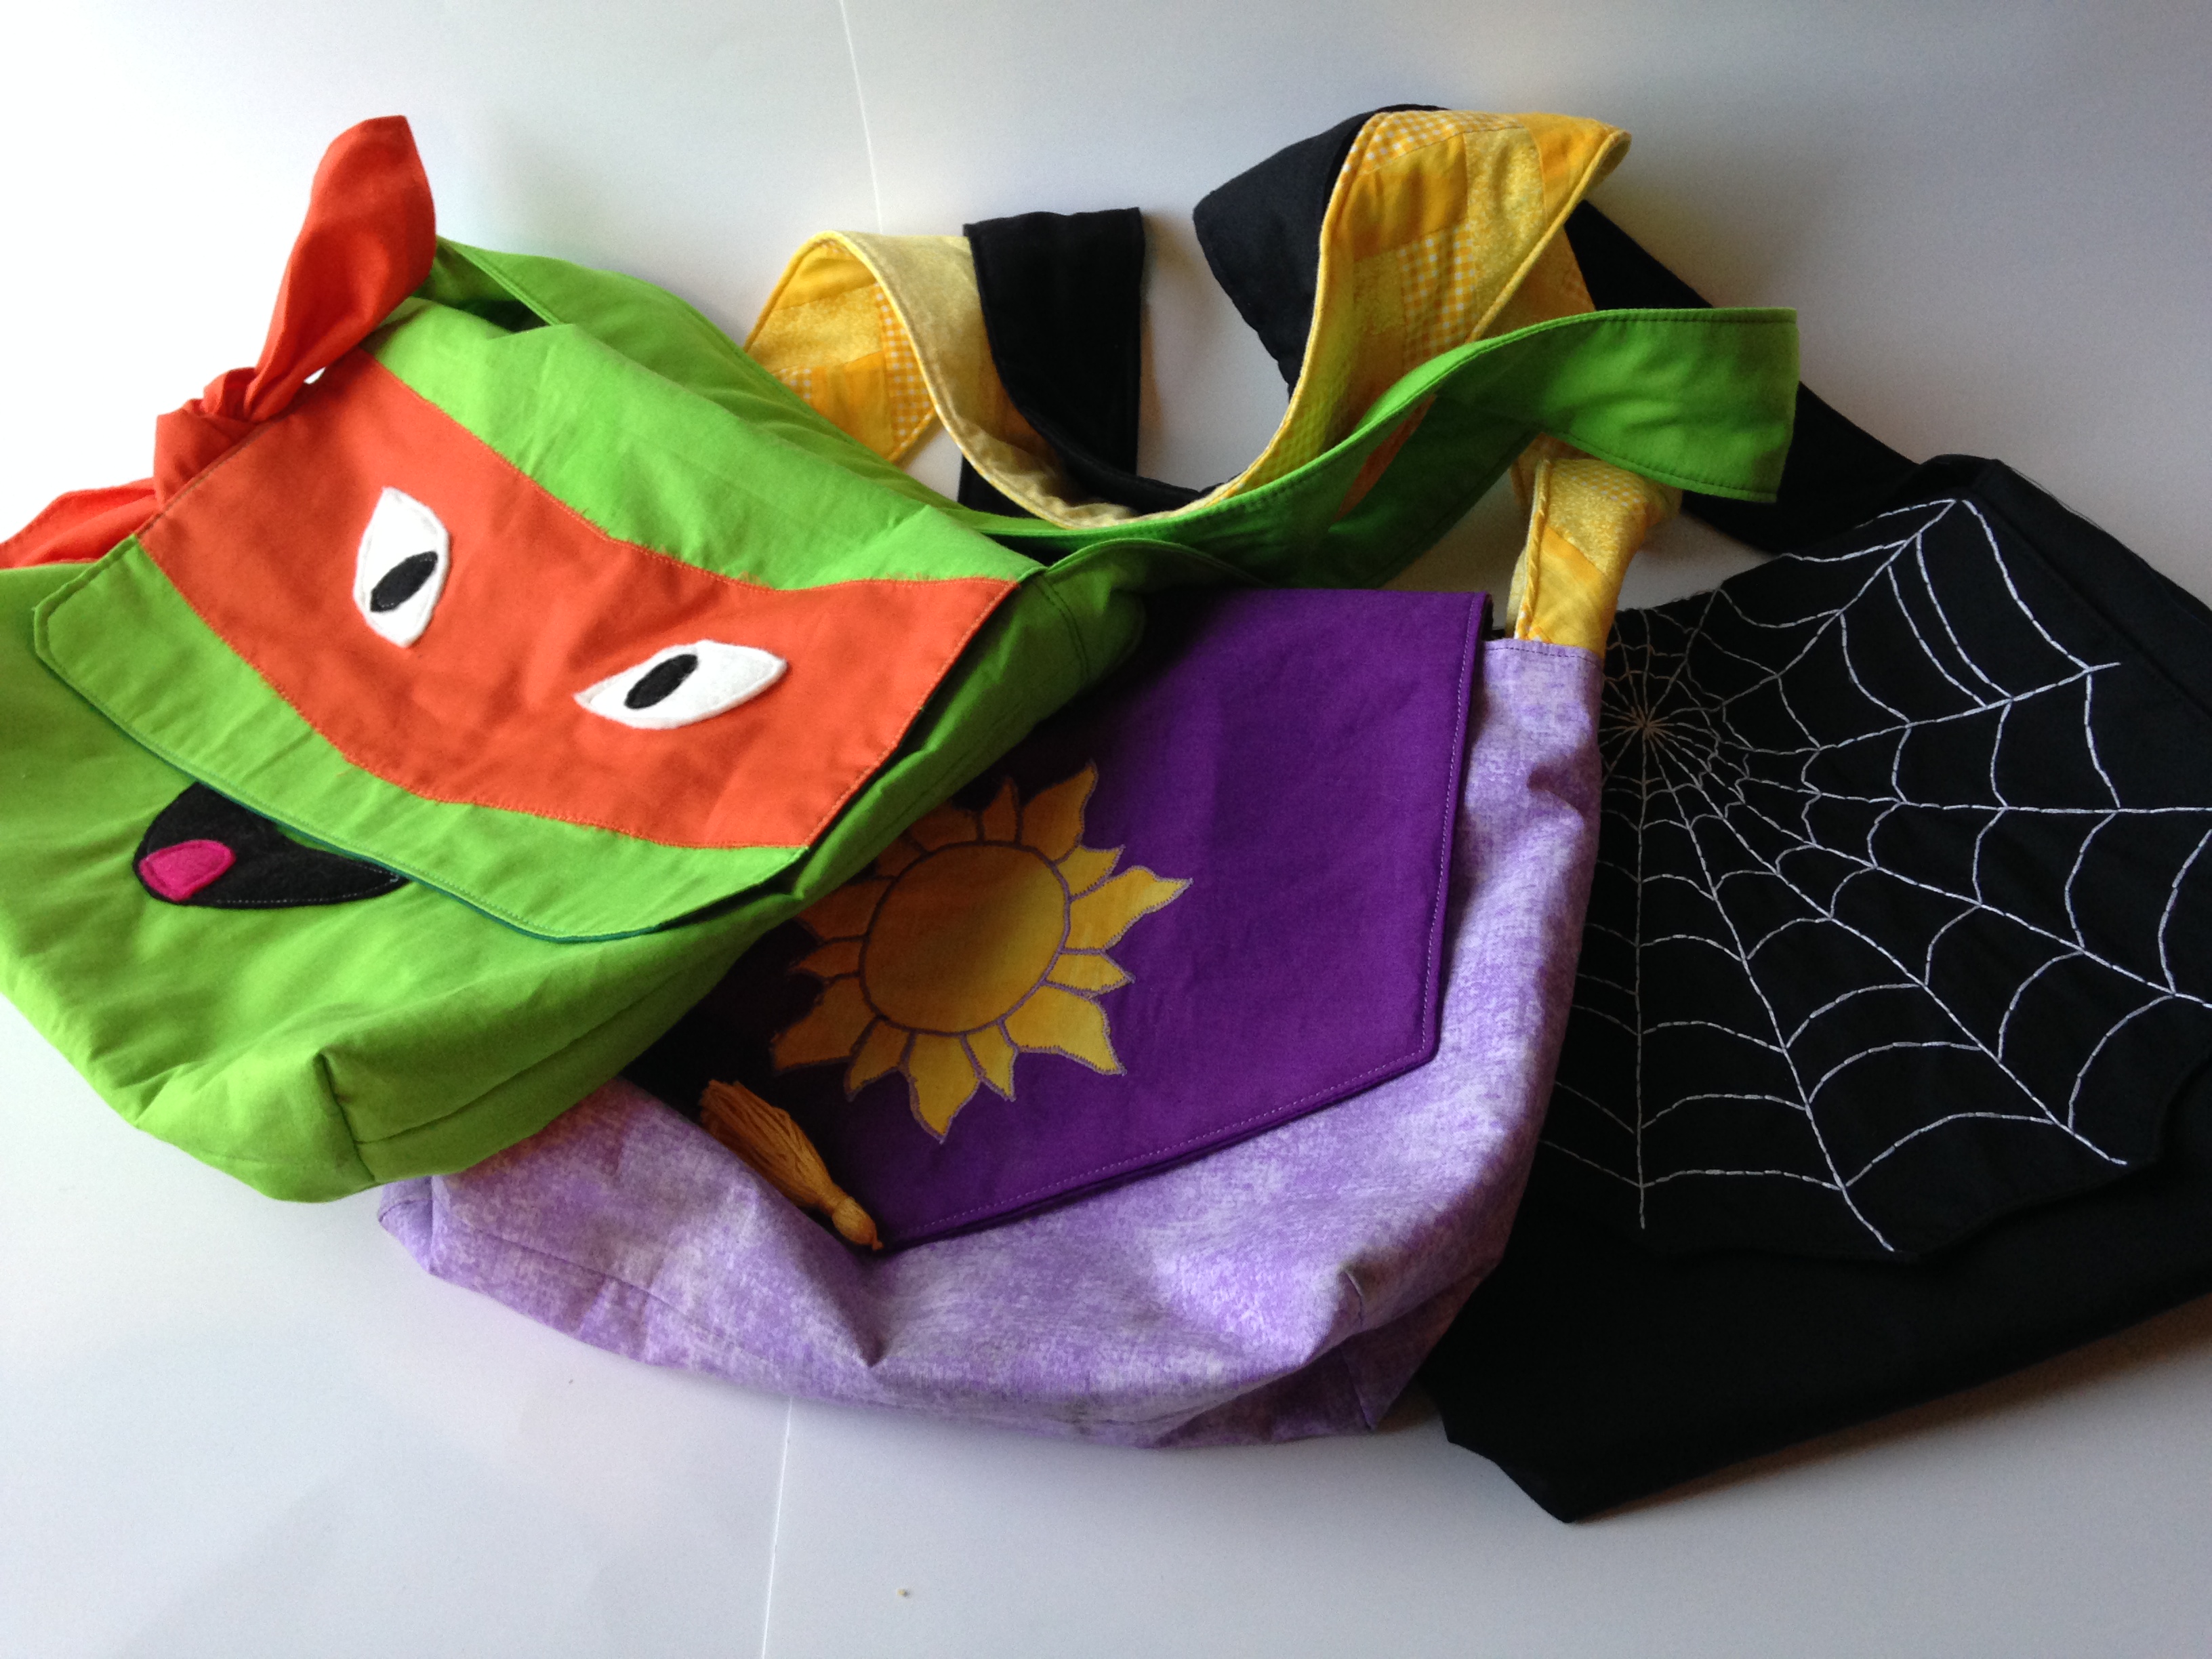
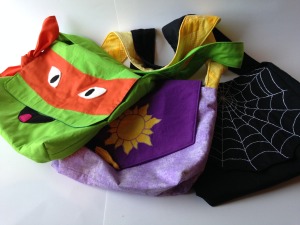
Welcome to another edition of Geek-Craft. Today’s project from 5 Little Monsters is a great idea for little ones. It is a messenger style bag that is perfectly sized for little kids and can be customized to go along with any theme or costume. Erica finished ours just in time for the kids to use them with their costumes. Each one matched a costume theme, and looked great, completing the cosplay look each of the kids were going for. Plus, it was great for the kids to carry their water bottles and any little goodies they got at the con, then mom and dad didn’t need to. These are going to work great as well for trick or treating when we pull out those same costumes for Halloween (Hey, we’re on a budget). Here is a picture of 3 of our little monsters in costume with their matching bags:

Don’t they look great? I think so. So, with nothing further from me, here is Erica from 5 Little Monsters and her perfect sized messenger bag. Let’s get crafty:
Kid’s Perfect Sized Swag Bags
The basic construction for each of these bags is exactly the same but each one has details that make it different than the others. Most of the differences are in how the flaps are made so I will explain each flap separately. This is just a tutorial, not the actual patterns, just a description of how you can make your own, and the measurements that I used. I will show how I made the Ninja Turtle, Rapunzel, and Black Spiderman bags, but you could use this idea to make any character you would like.
To begin you will need:
For the Rapunzel bag
- 1/2 yard of lt. purple fabric
- 1/3 yard of dk. purple fabric
- 1/2 yard of lining fabric
- 1/8 yard of 4 different yellows
- fusible interfacing (I used lightweight because that was all that they had where I bought mine but a little heavier would have been nice) approx. 1 yard
- 3 1/2″x36″ piece of thin batting
- yellow embroidery floss
- matching thread
For Black Spiderman
- 3/4 yard black fabric
- 1/2 yard lining fabric
- 1 yard fusible interfacing
- 3 1/2″x36″ piece of thin batting
- white embroidery floss (I used more than one skein)
- black thread
For the Ninja Turtle
- 3/4 yard green fabric
- 1/2 yard lining fabric
- 1/8 yard mask color fabric
- 1 yard fusible interfacing
- 3 1/2″x36″ piece of thin batting
- scraps of white, black and pink felt
- matching thread
I used 1/2 inch seam allowances unless otherwise noted
Flaps
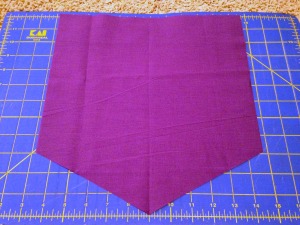
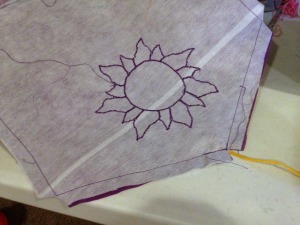
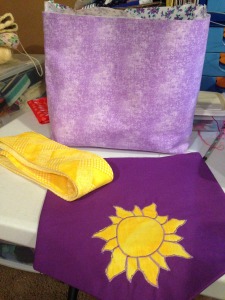
Rapunzel:
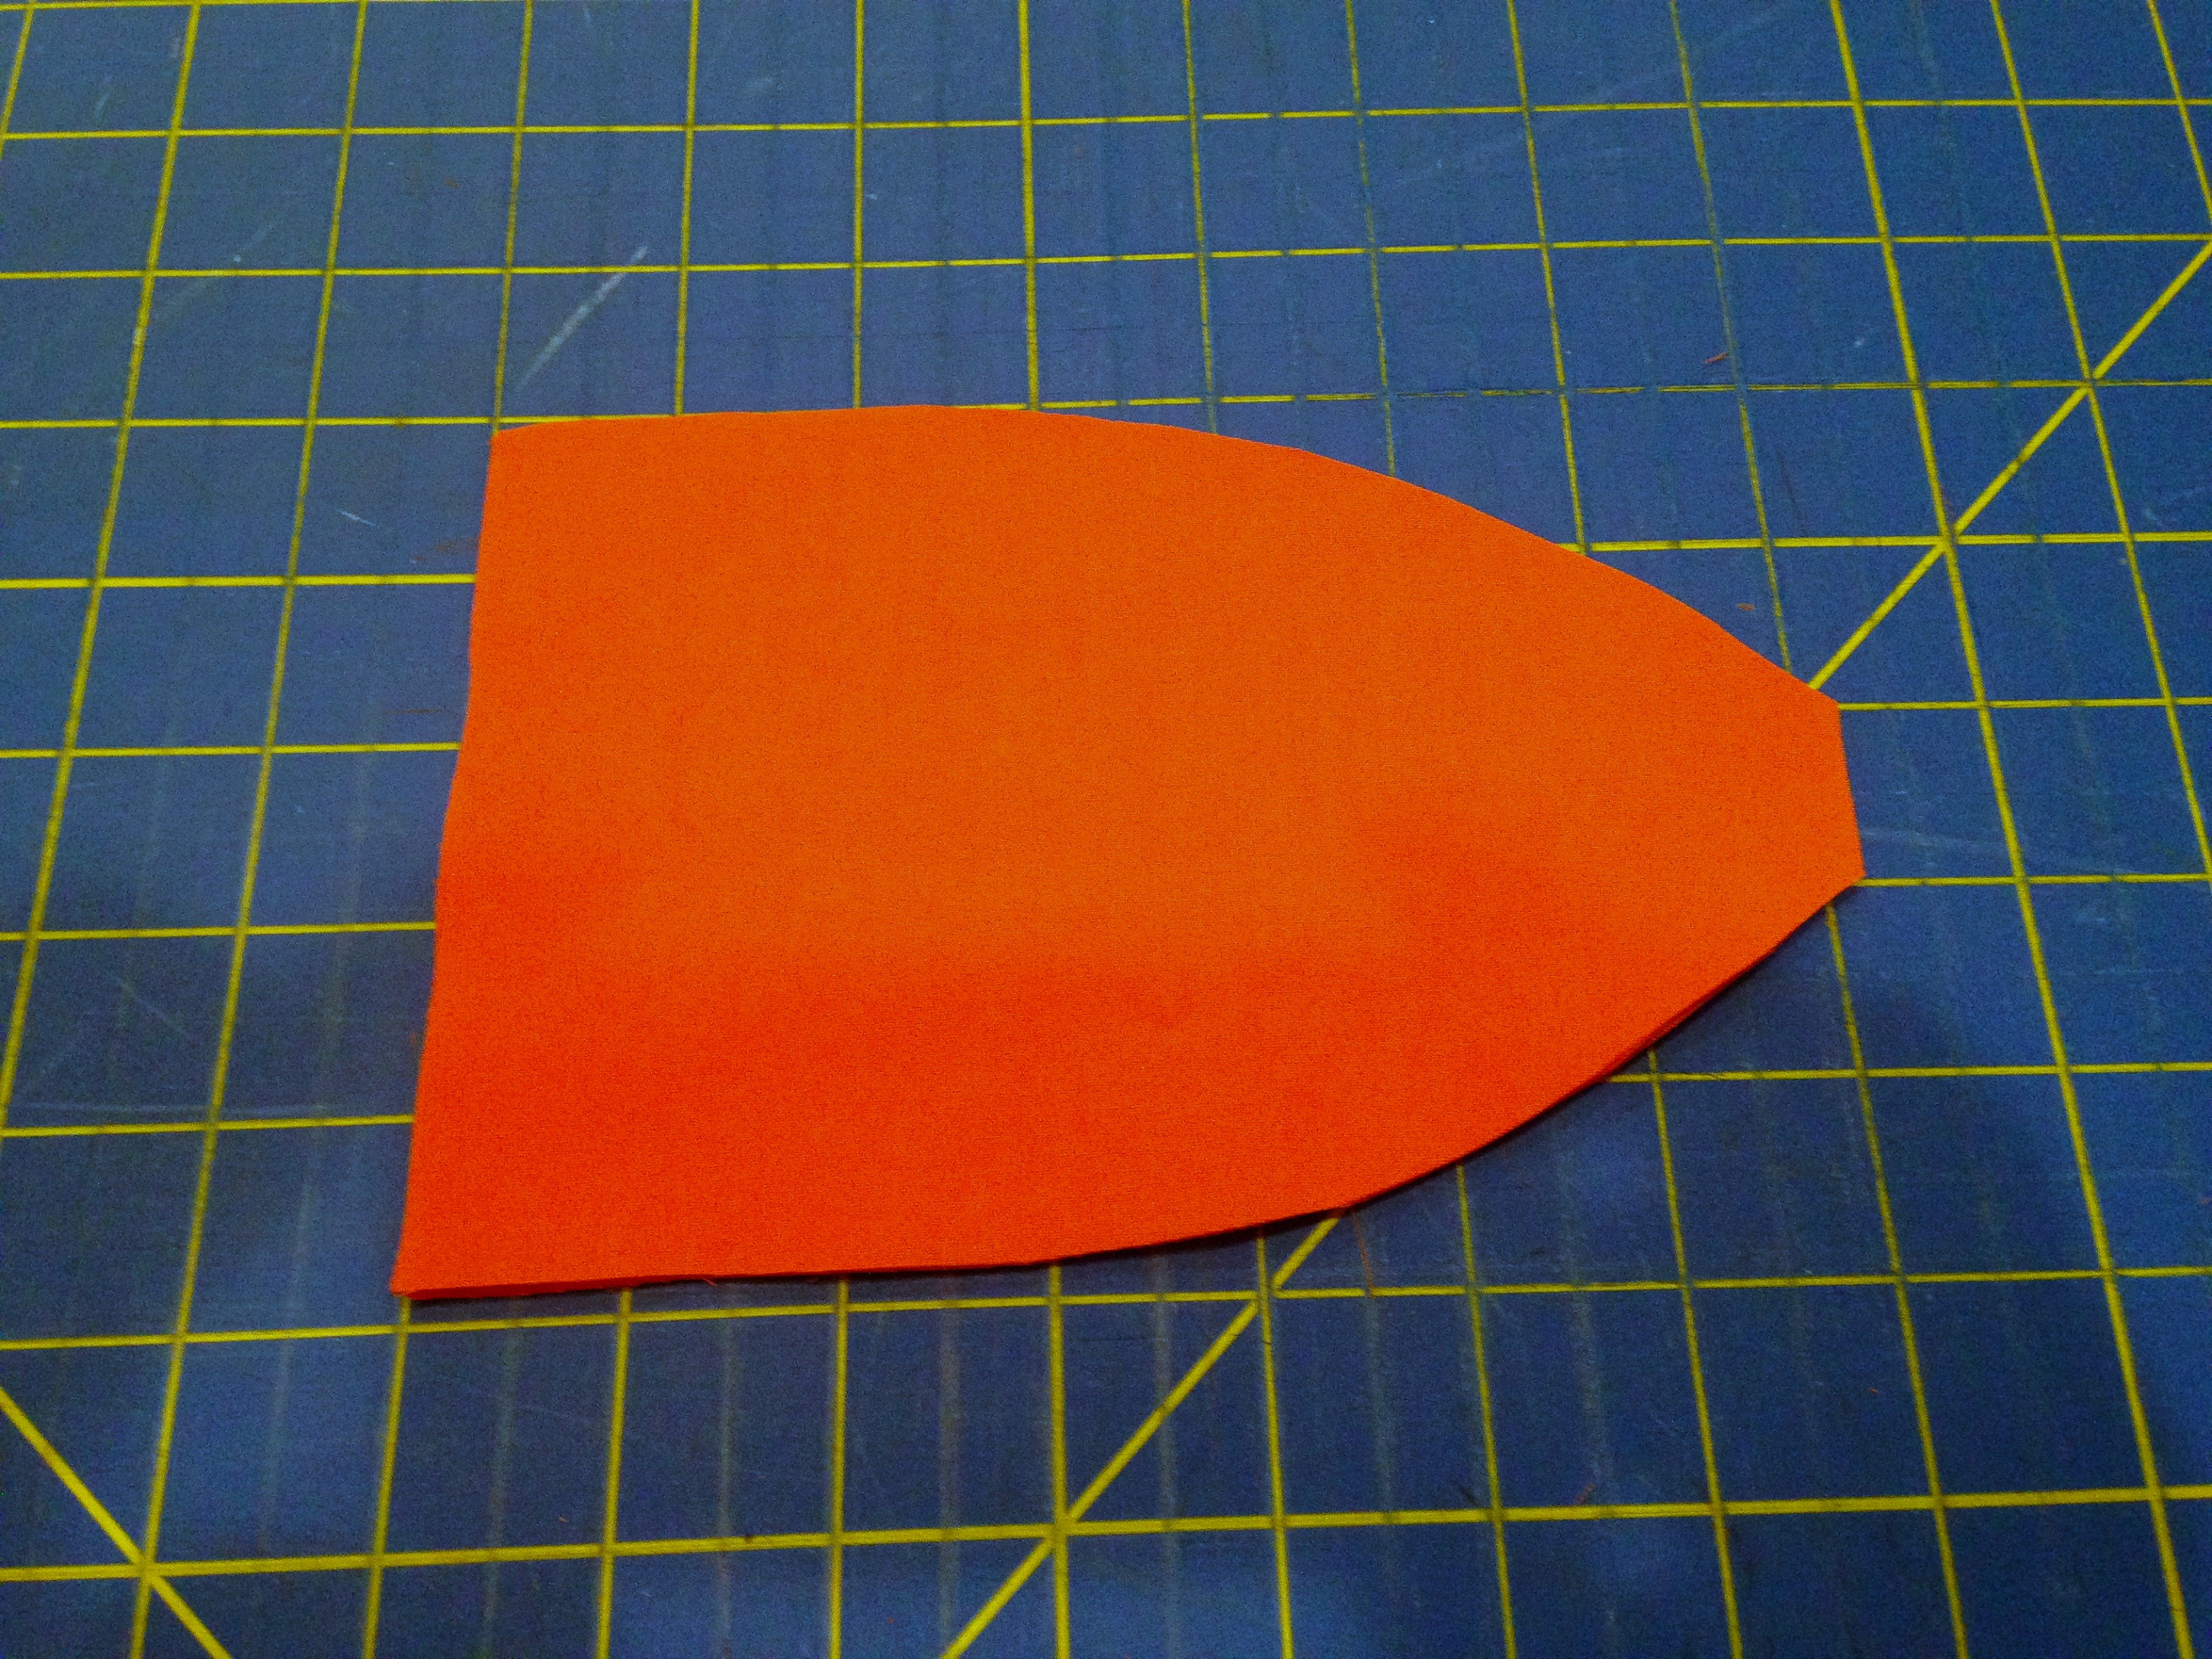
From the dark purple fabric, cut 2 pieces 12 inches x 12 inches. Fold in half and cut an angle from the center up 3 inches on one side. When you open it back up it should look like this:
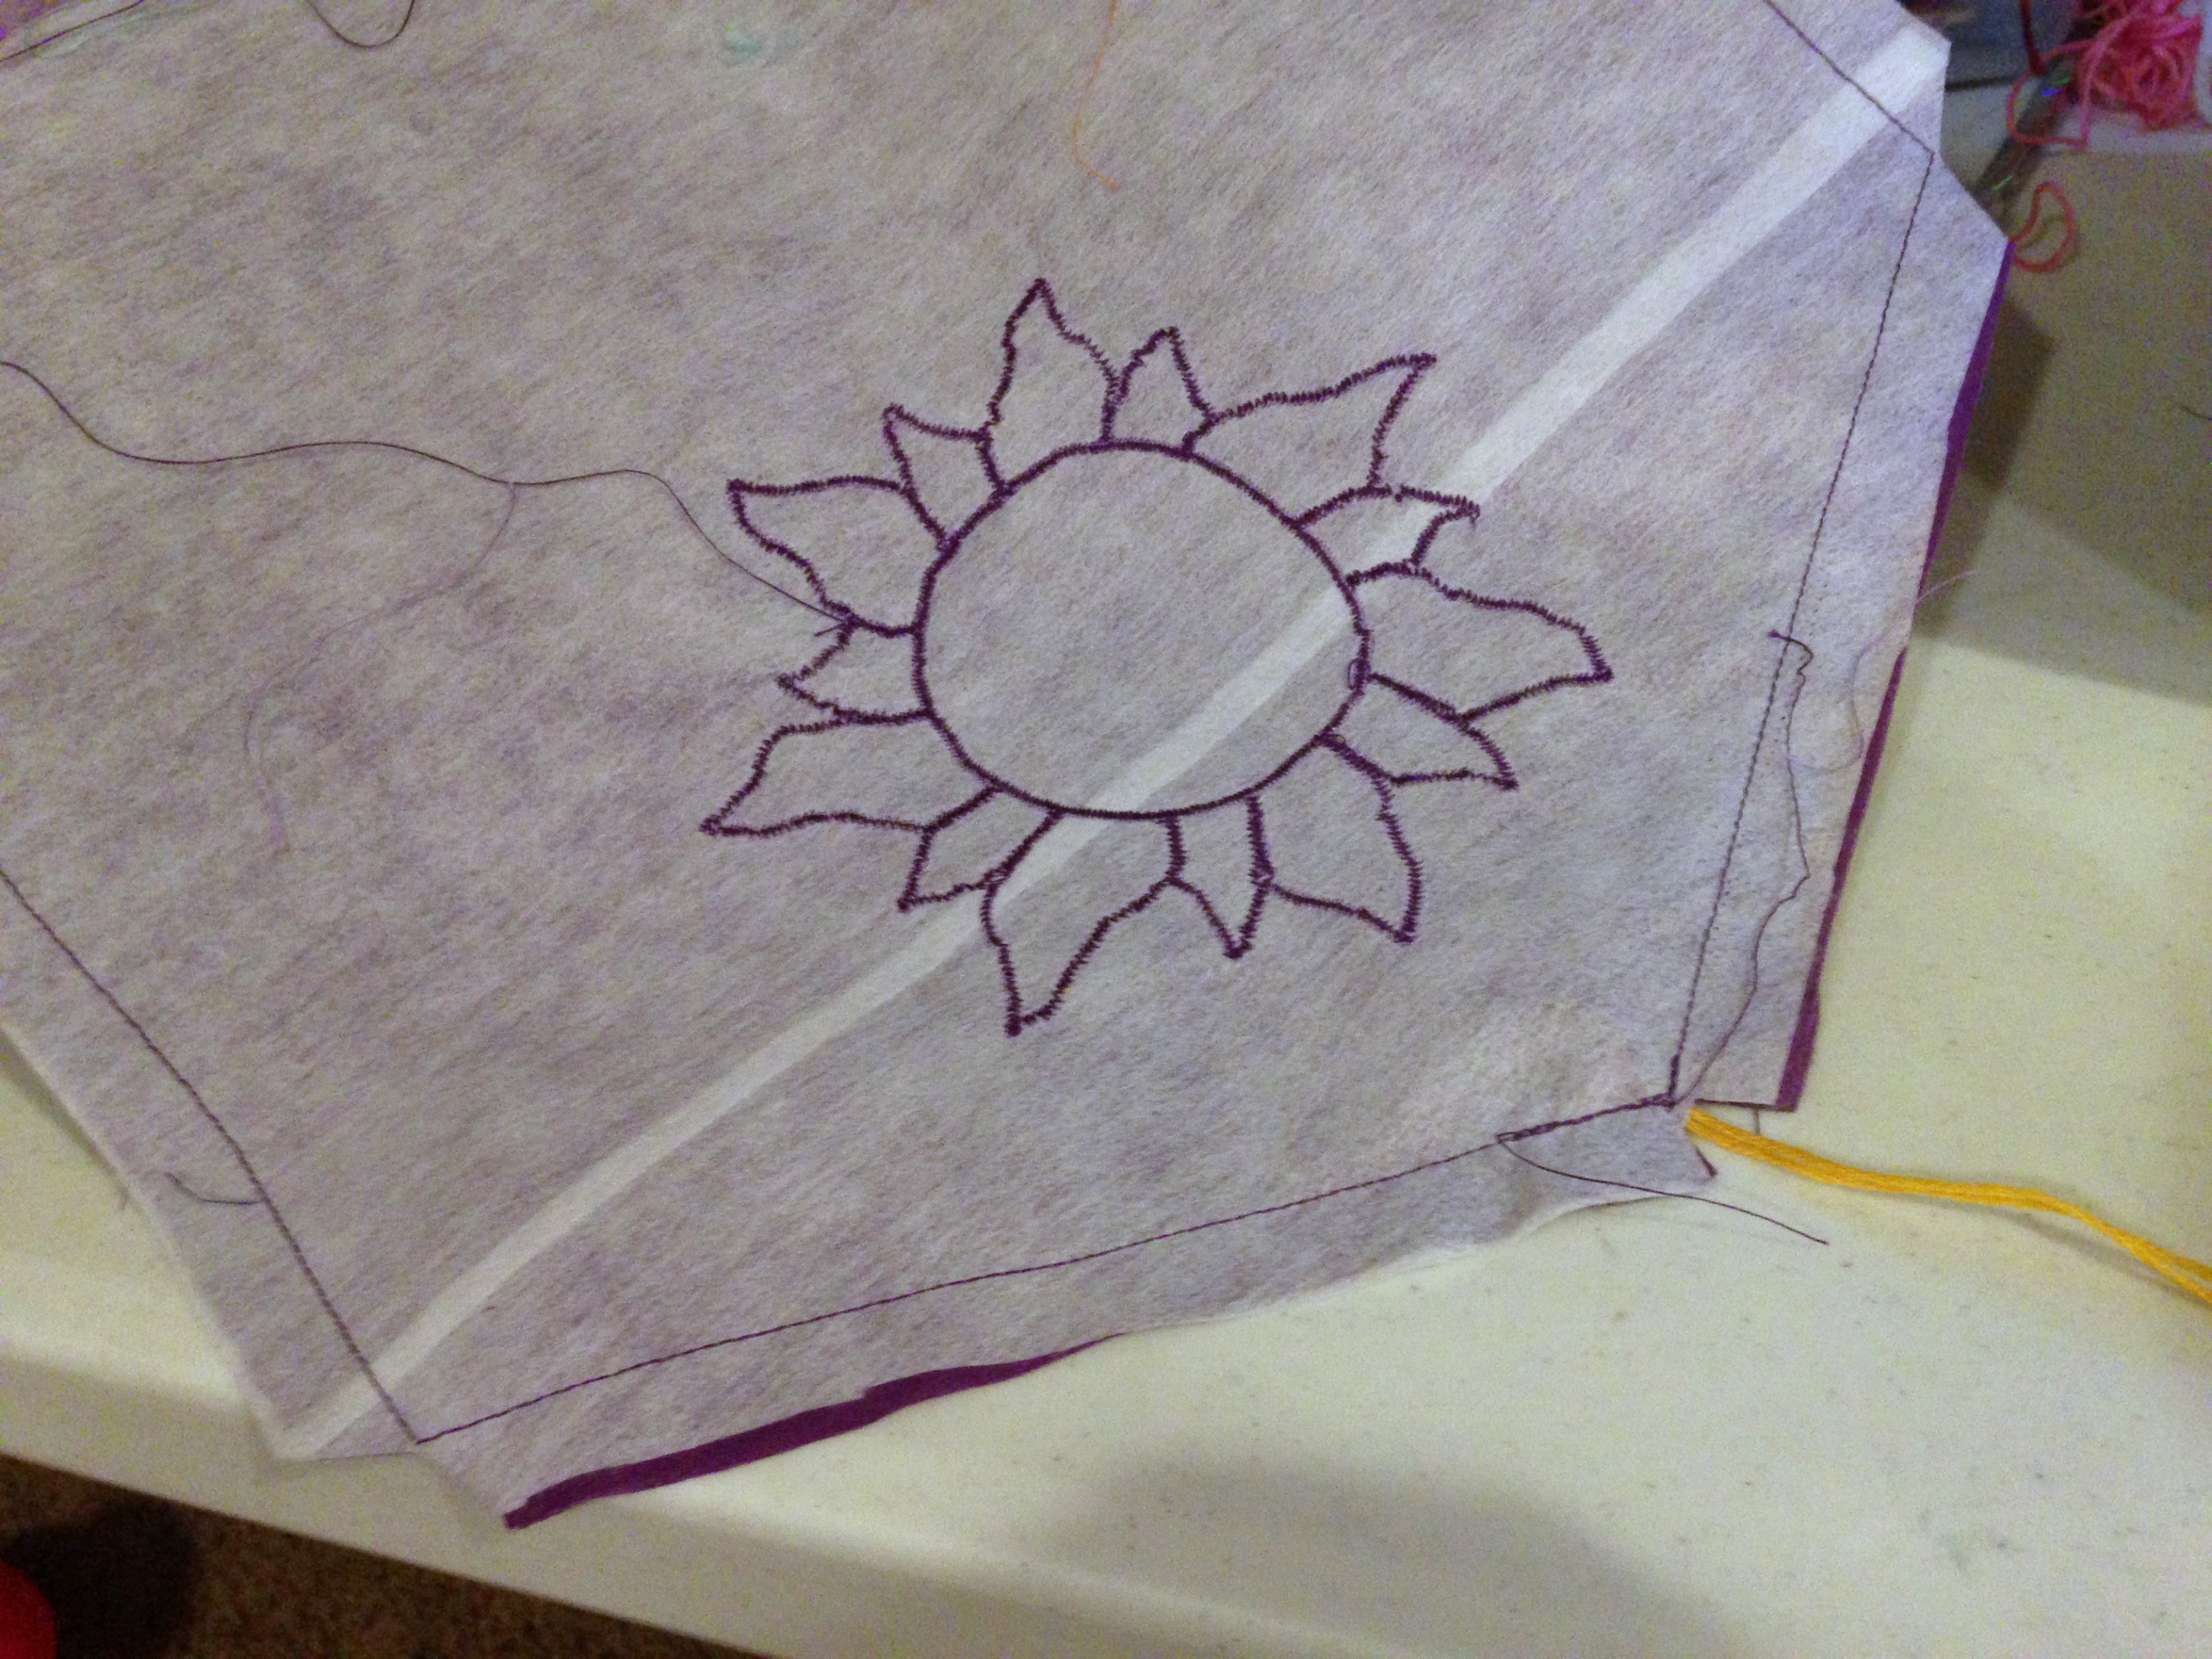
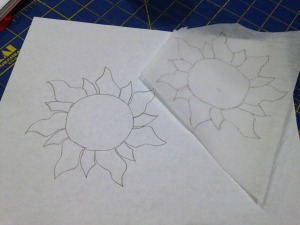
Also cut a piece of fusible web the same size and iron it on to the back of one piece. I drew a sun shape but I am sure you could find one online to print and trace. Mine was approximately 5 inches wide. Trace your sun onto a piece of the fusible web, Iron it onto a scrap of yellow fabric and cut it out, just around the outside of the sun.
Applique the sun onto the flap using dark purple thread and make the details in the suns rays. I did all of that with a thin, tight zigzag stitch. I started with the circle in the middle and then went around each ray.
After that you will make your tassel. I wrapped yellow embroidery floss several times around my plastic ruler that is 5 inches wide. Then take it off, fold it in half over a piece of embroidery floss and wrap several times a little below the top, then tie of and tuck in the ends. The piece that you folded the tassel over is what will get sewn into the flap.
Now you will sew the 2 flap pieces right sides together along the 2 sides and the pointed end, with the tassel tucked in at the point. Clip the points carefully, making sure you do not cut the tassel thread. Turn right side out, press and topstitch close to the edge.
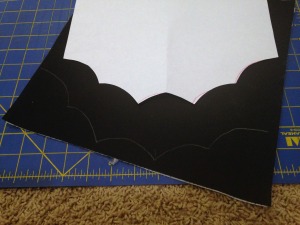
Spiderman:
Cut 2 flaps 12 inches x 12 inches. Cut one piece of fusible web the same size and iron on to one of the flap pieces. I traced some scallop shapes using a sheet of paper (11″) and a juice container but anything round will work. You want the point of the scallops on the outside and for the edge to curve up (like the edge of a spiderweb). I then cut that out and using a white colored pencil traced that edge onto my black flap with the interfacing slightly above the edge of the fabric. Turn over and try to line up the design over the design you just traced on the front and trace again on the back side. This will be your sewing line later.
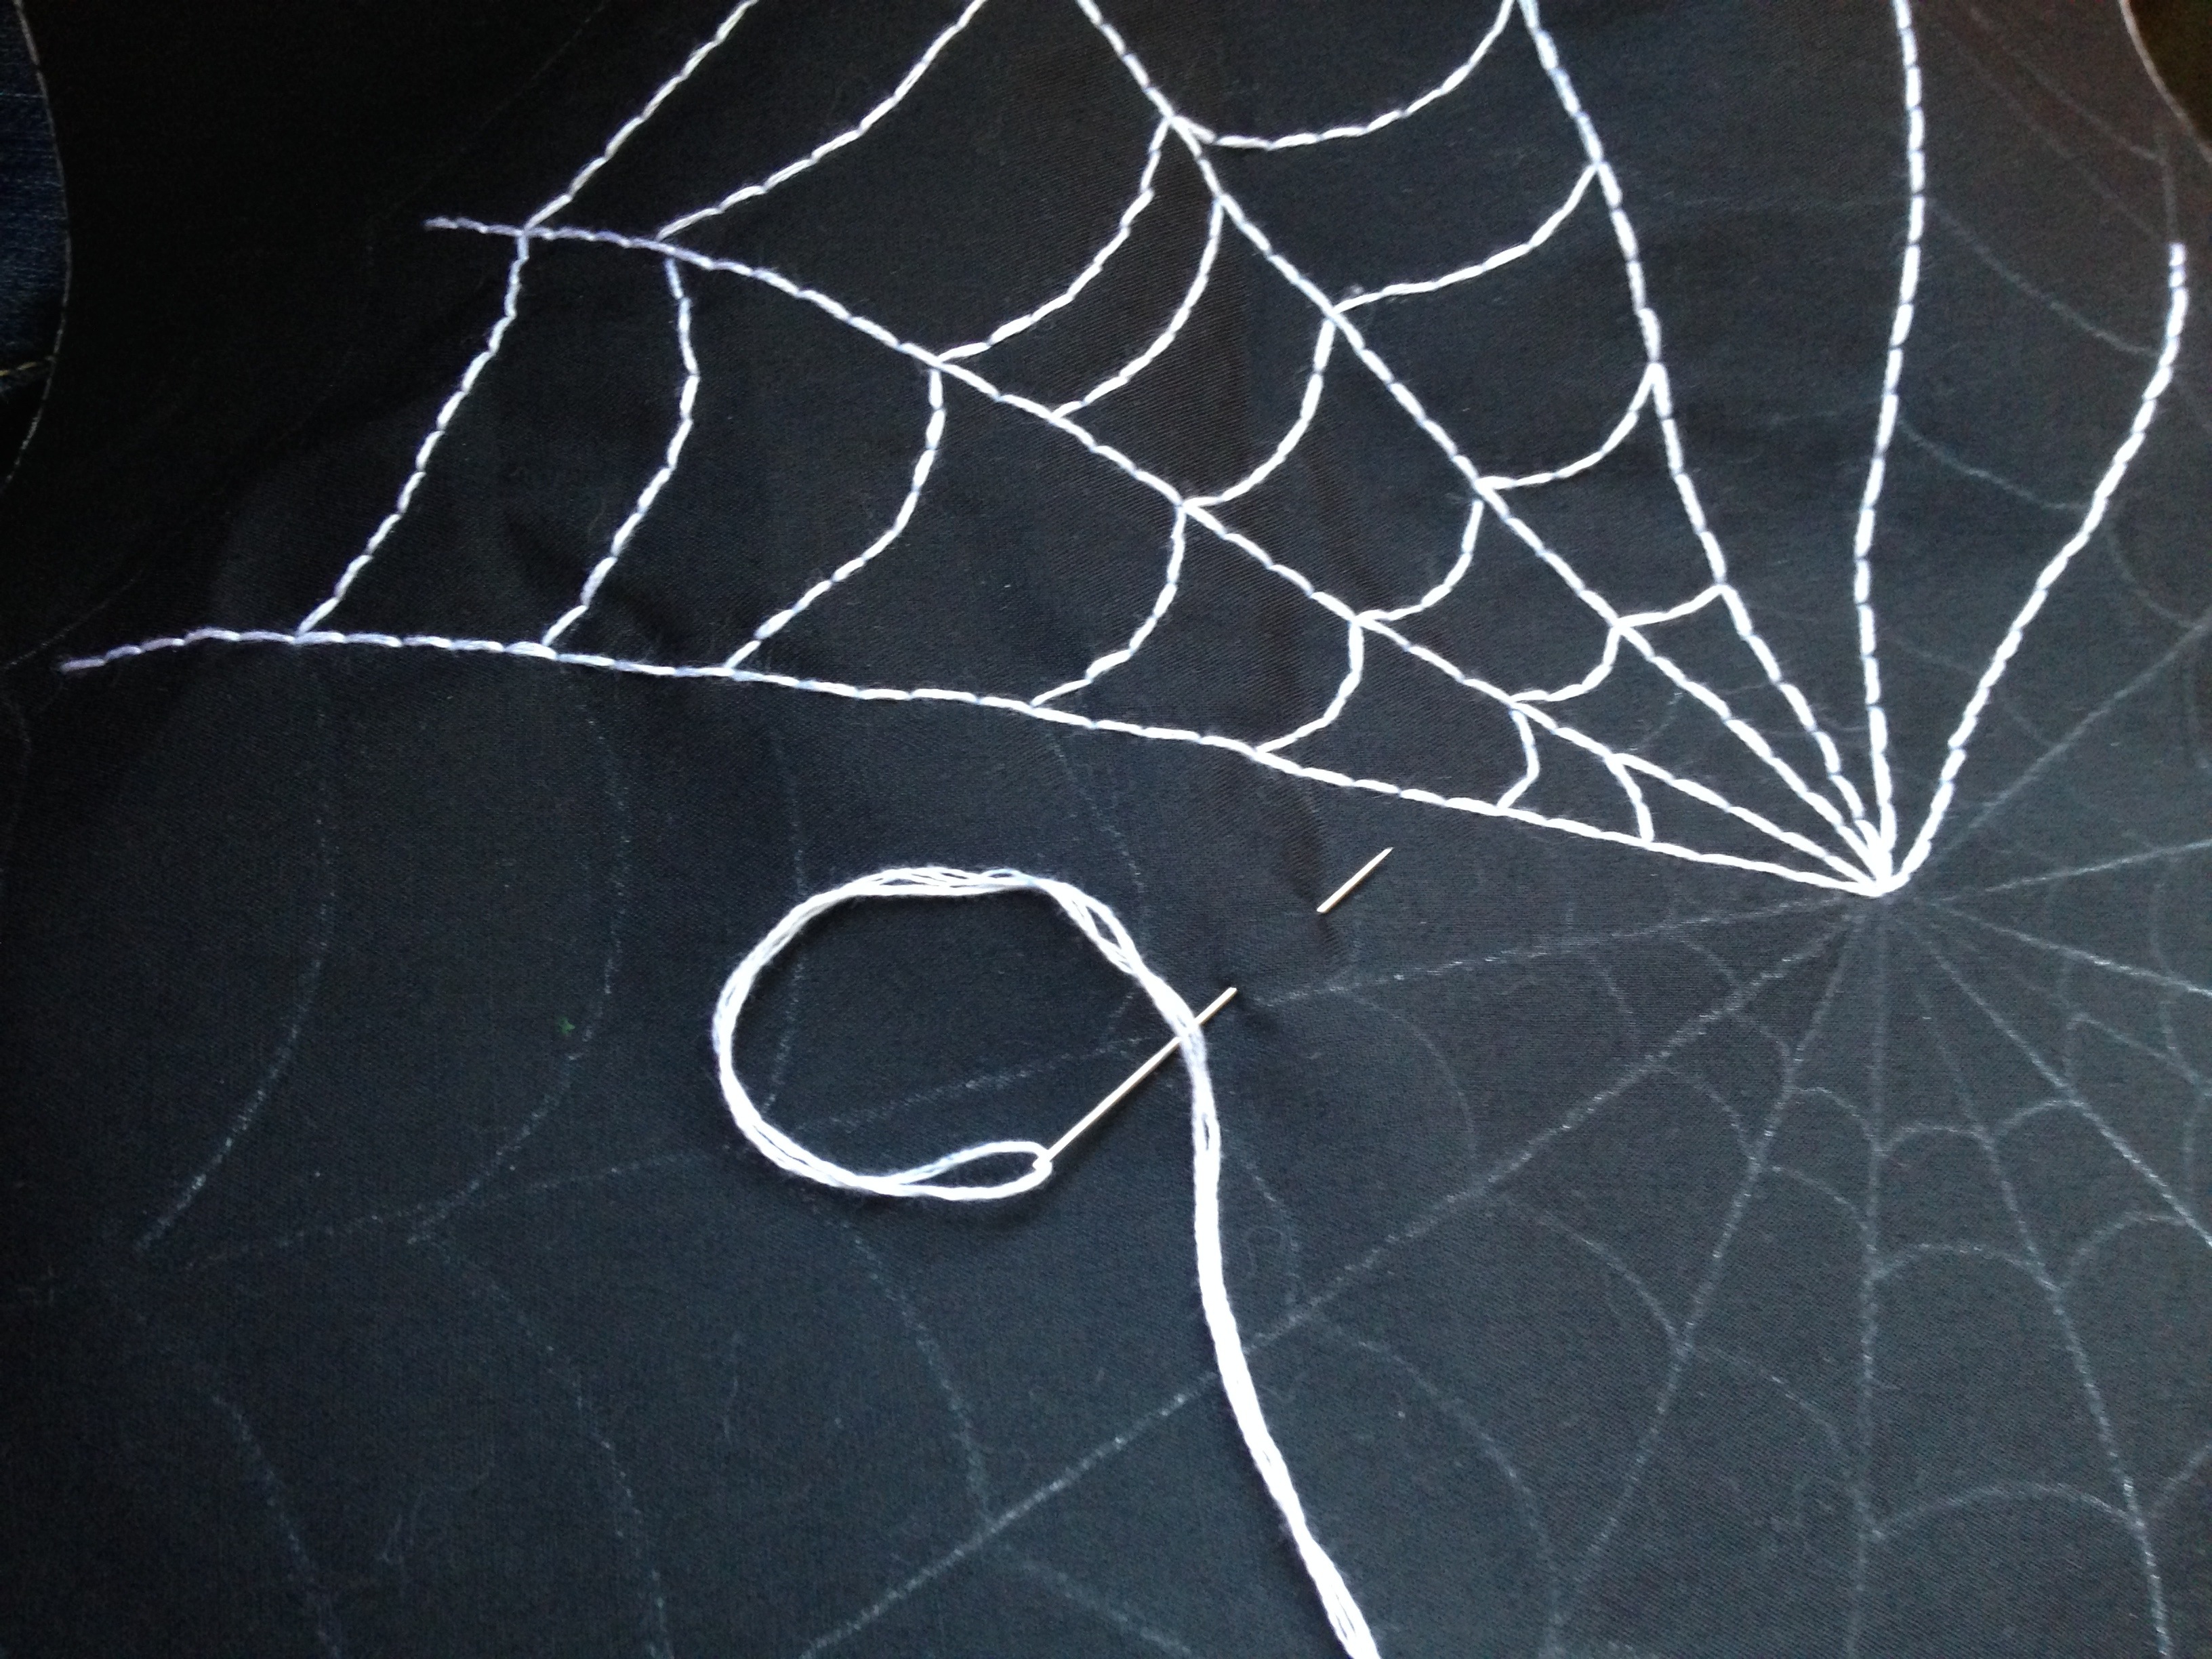
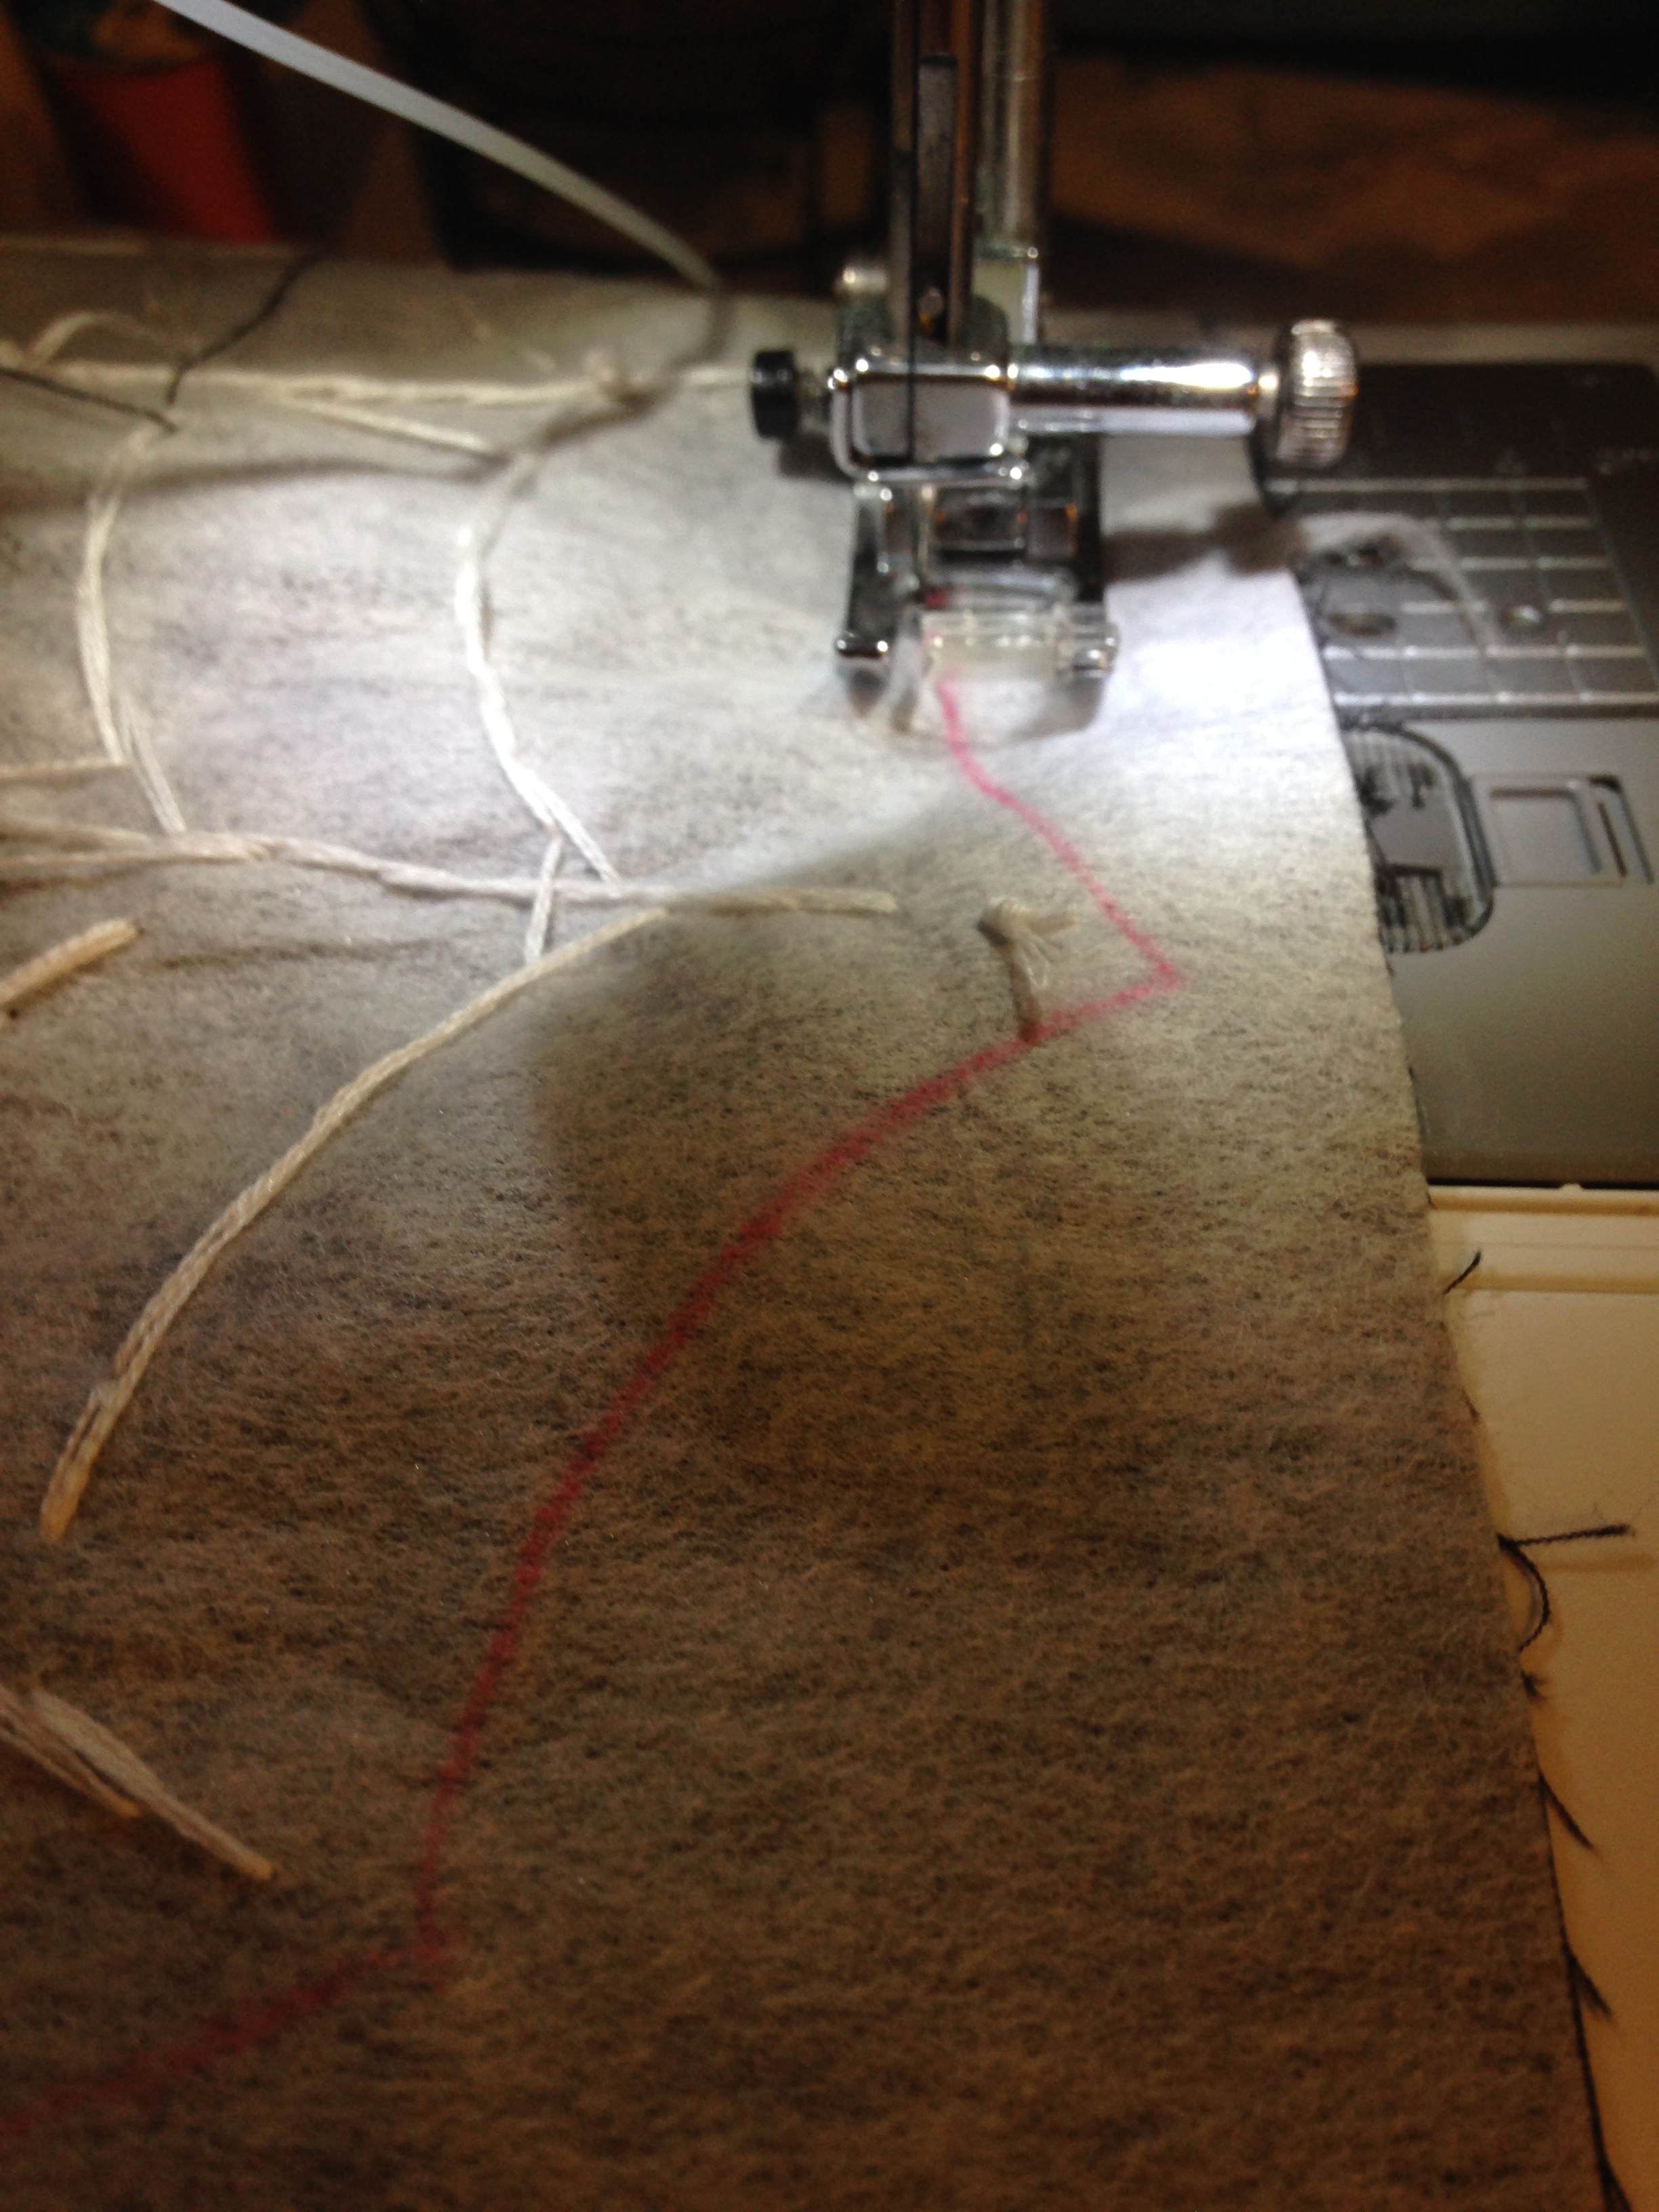
Now draw a spiderweb design using your white pencil. Stop your web about 1/4-1/2 inch above the line you drew as that will be your sewing line. I picked a spot in the center and for my lines to radiate out from and used my ruler as a straight edge to give me nice straight lines. Draw lines from the center point down to the points of your scallop design and continue going around the flap. Draw swoops between your straight lines to make the web design.
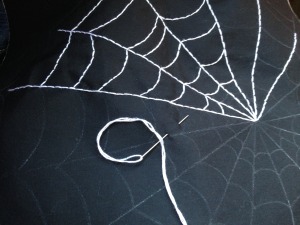
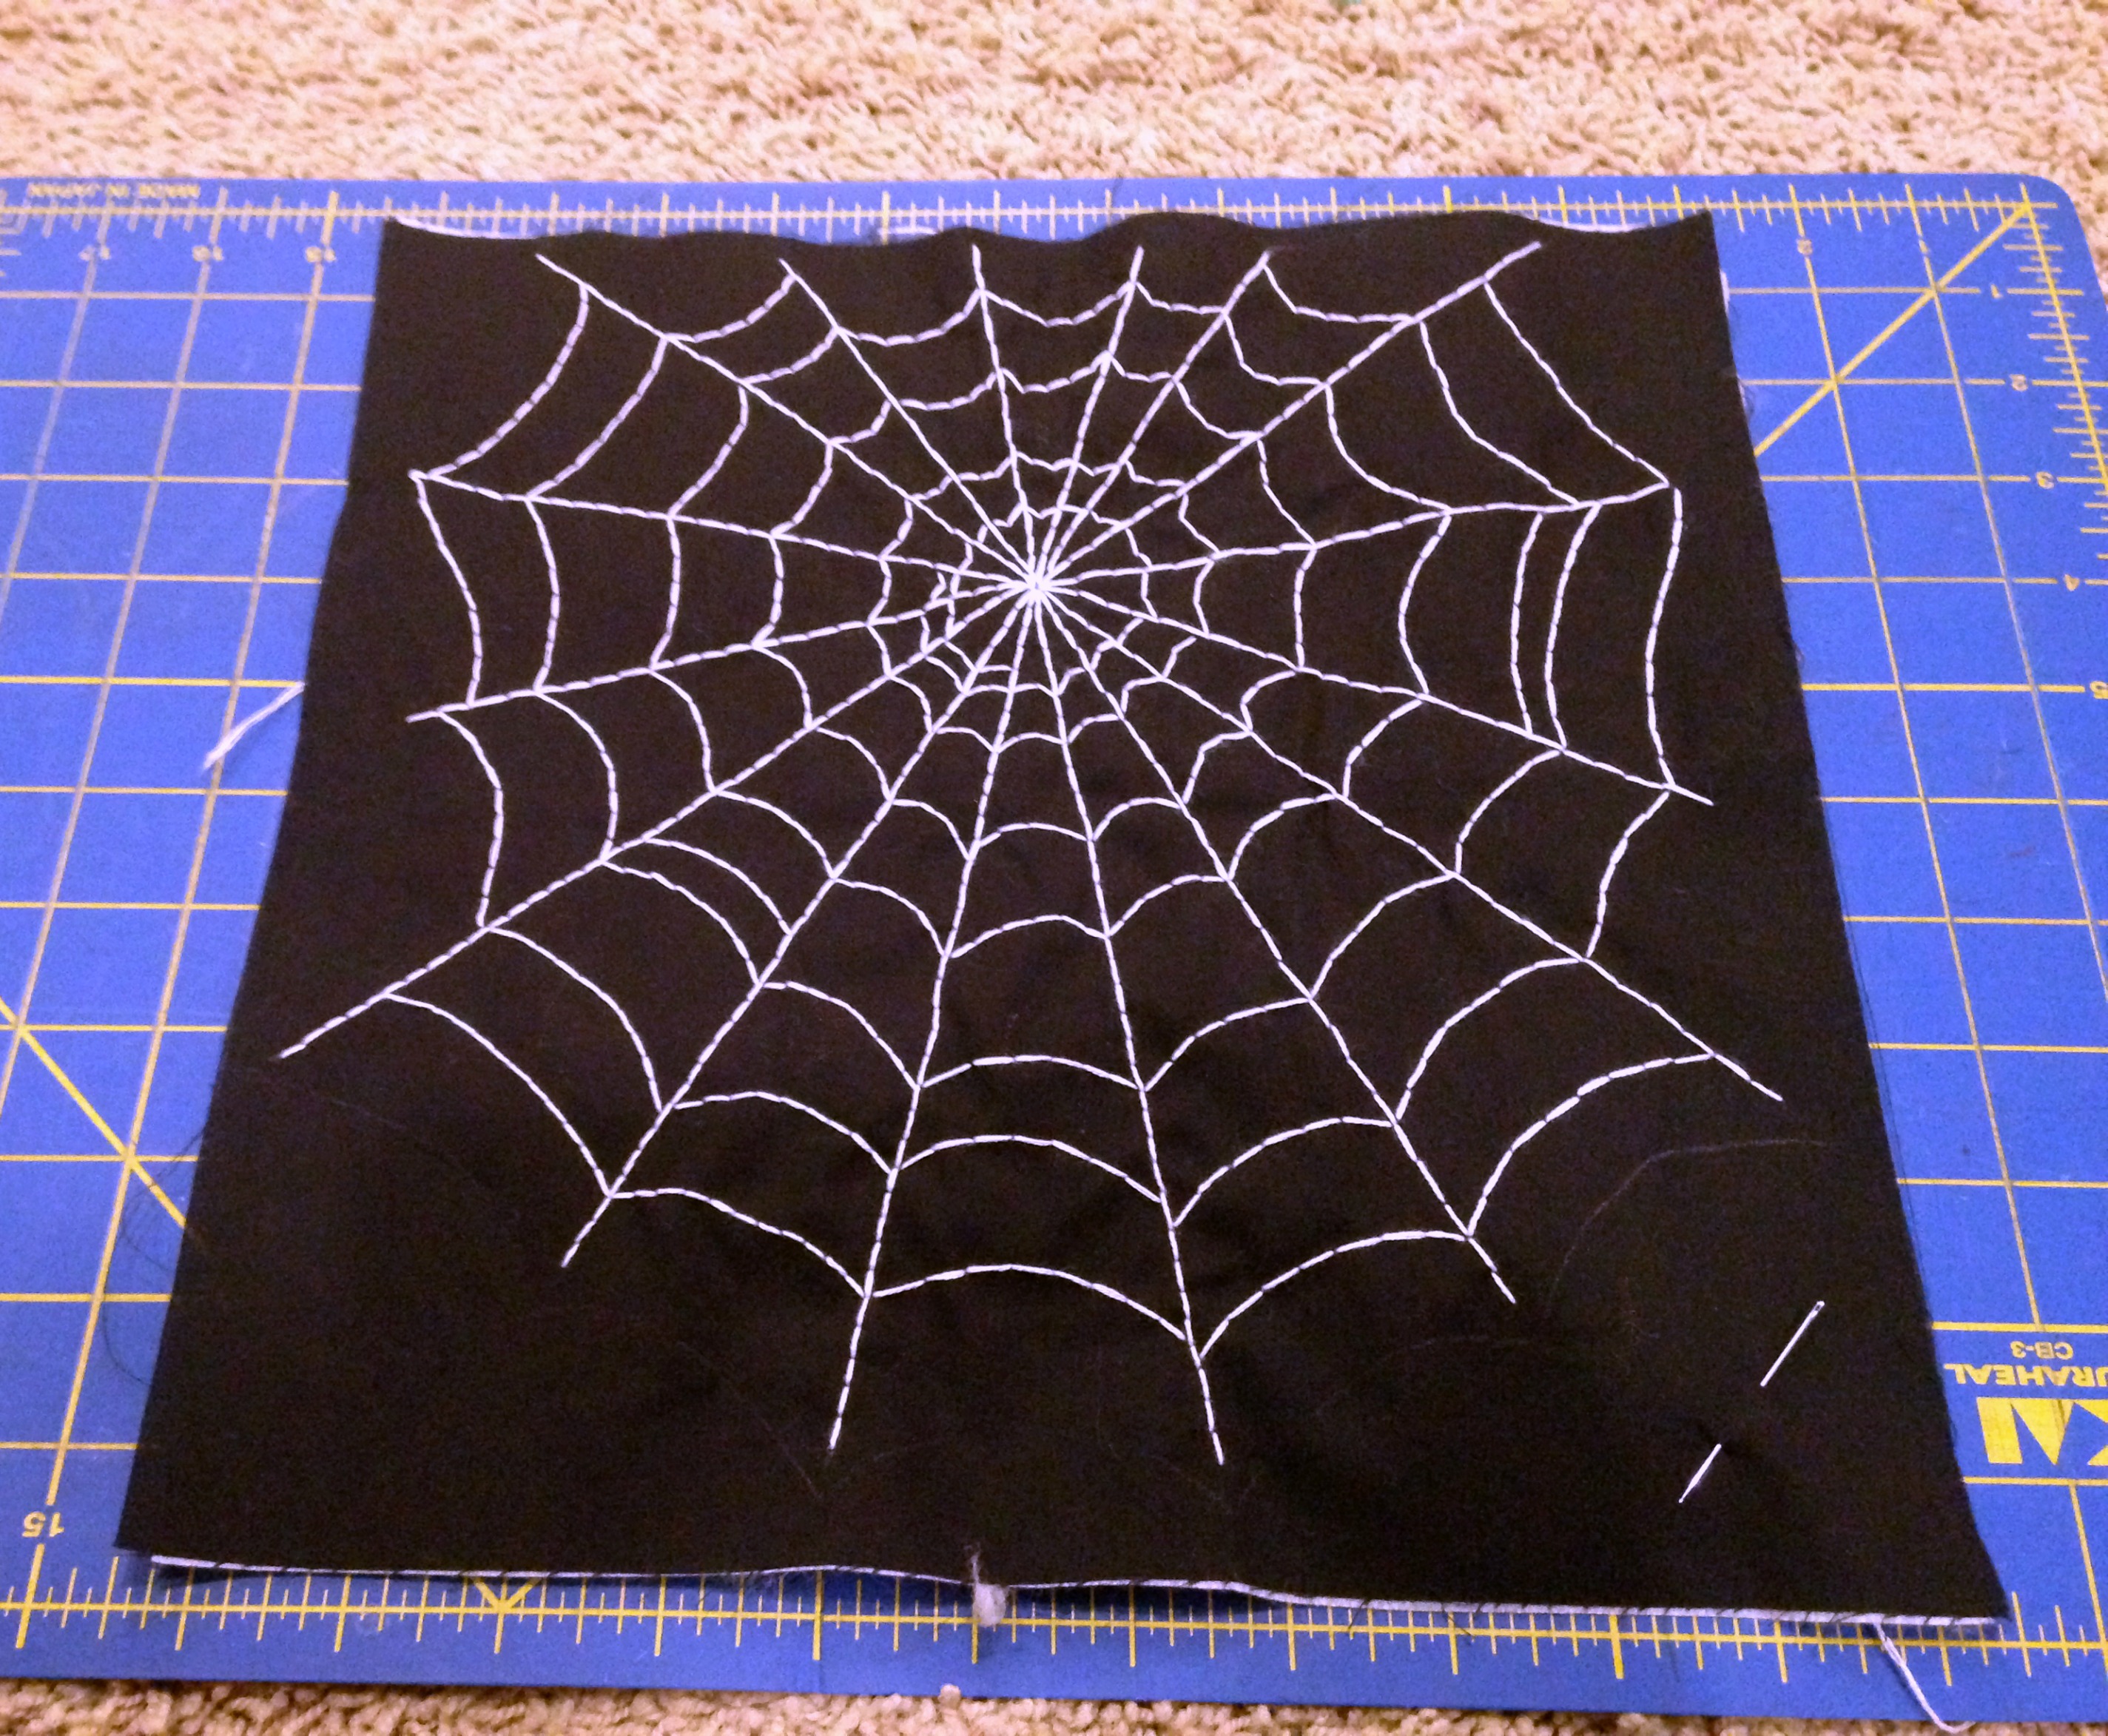
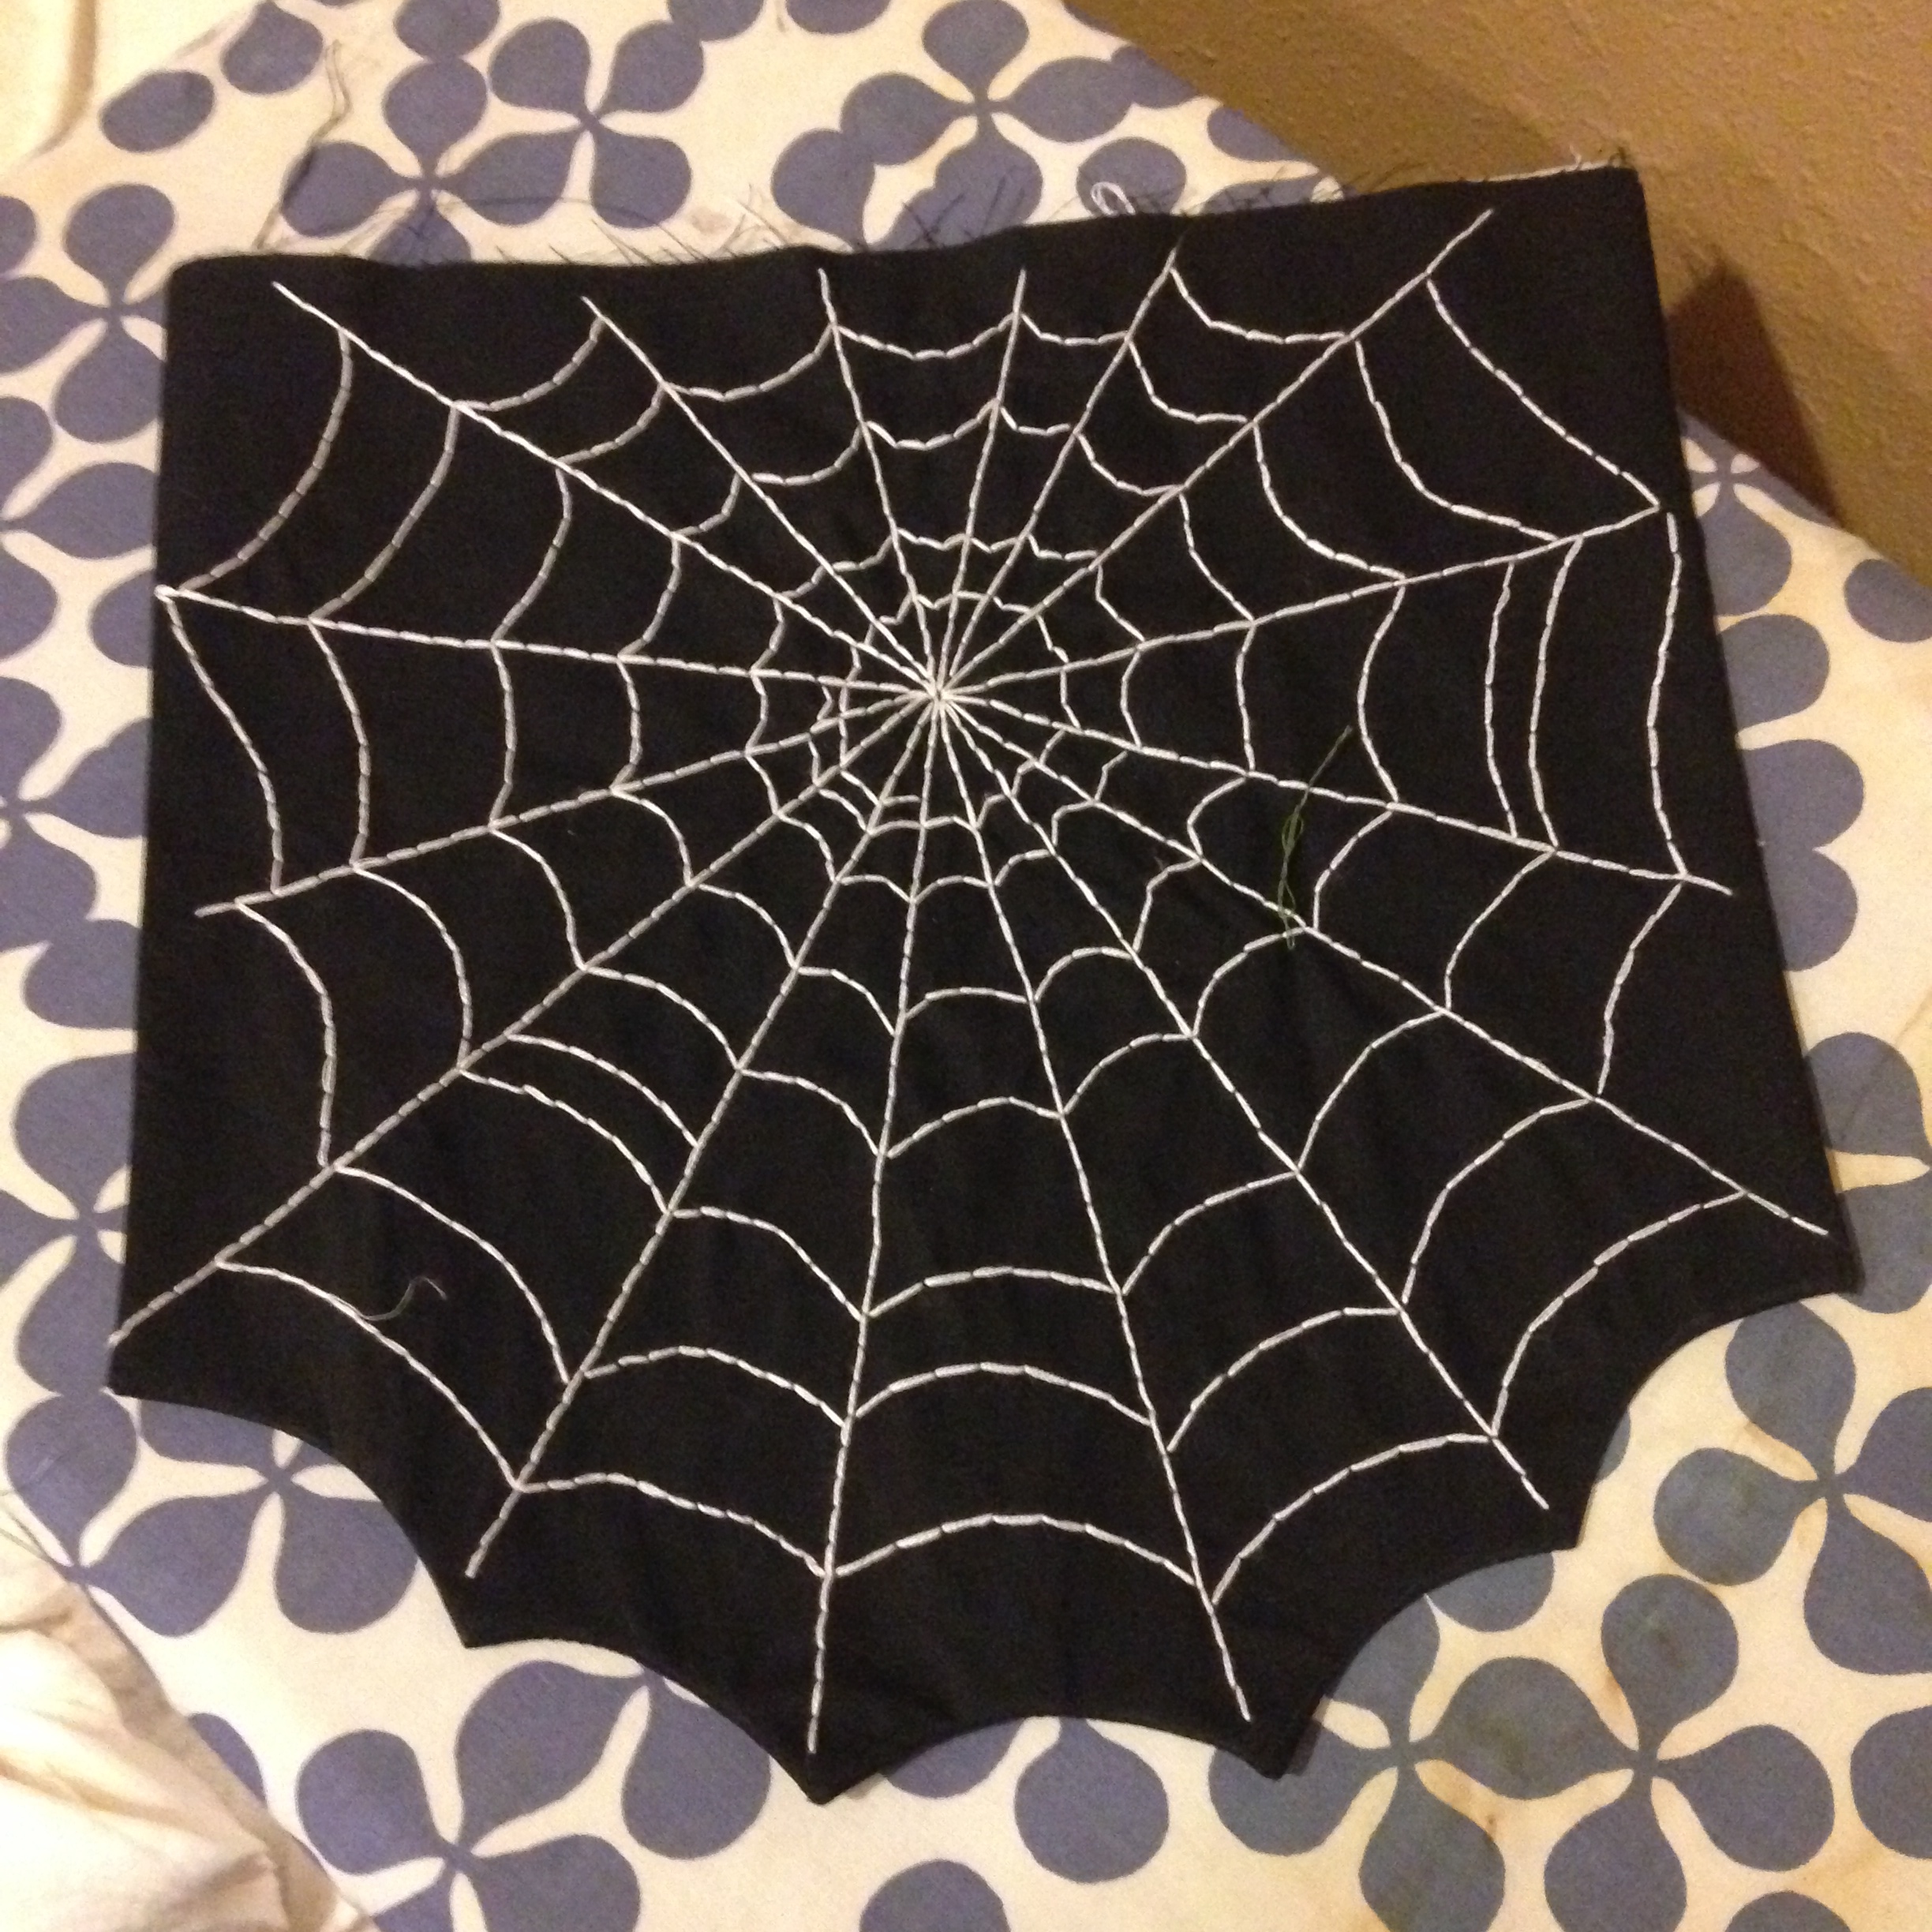
Now embroider over those lines with 3 strands of white embroidery floss. I’m not going to lie, this was by far the most time-consuming part of any of these bags. I really wanted the embroidered look but you could try stitching the lines on with your machine instead if you wanted it to be quicker but the lines would be a lot thinner.

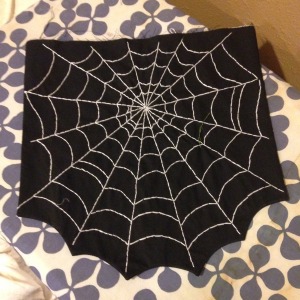
Once your embroidery is finished, place the two flap pieces right sides together and sew along the side with a 1/2″ seam allowance until you get to the line you drew, then sew along the line and up the other side with a 1/2″ seam allowance.

Clip the points and either clip the curves or I used pinking shears along the curves to make a thin, zigzagged seam allowance. Turn and press among sure your points are nice and sharp. Topstitch close to the edge.
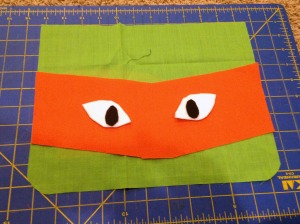
Ninja Turtle
Using your green fabric cut 2 pieces 12 inches x 10 inches. The 12 inch sides will be the top and bottom. Along the bottom, using something round, curve the corners. Cut the same shape from fusible web and iron onto one of the pieces.
Cut a 5 inch x 12 inch strip from the mask color. Fold in half and cut it so that it is four inches wide on the ends and angles almost like a v shape. Cut 4 pieces 4 inches x 7 inches and then curve one end to make the tie ends. (See picture to get a better idea of how they should be cut.)

Cut two eyes from white felt and two black circles for the pupils. Using a thin, tight zigzag stitch appliqué mask onto the flap. Using a straight stitch appliqué eyes onto mask. Sew the ties ends together 2 at a time, leaving the he straight end open. Clip curves, turn right side out, press and topstitch close to the edge.
Put the two flap pieces right sides together pin the tie ends in along one side of the mask pleating them when you pin them in so that they overlap but are not right on top of each other. Sew around sides and bottom, clip curves, turn, press and topstitch close to the edge.
Straps
Rapunzel
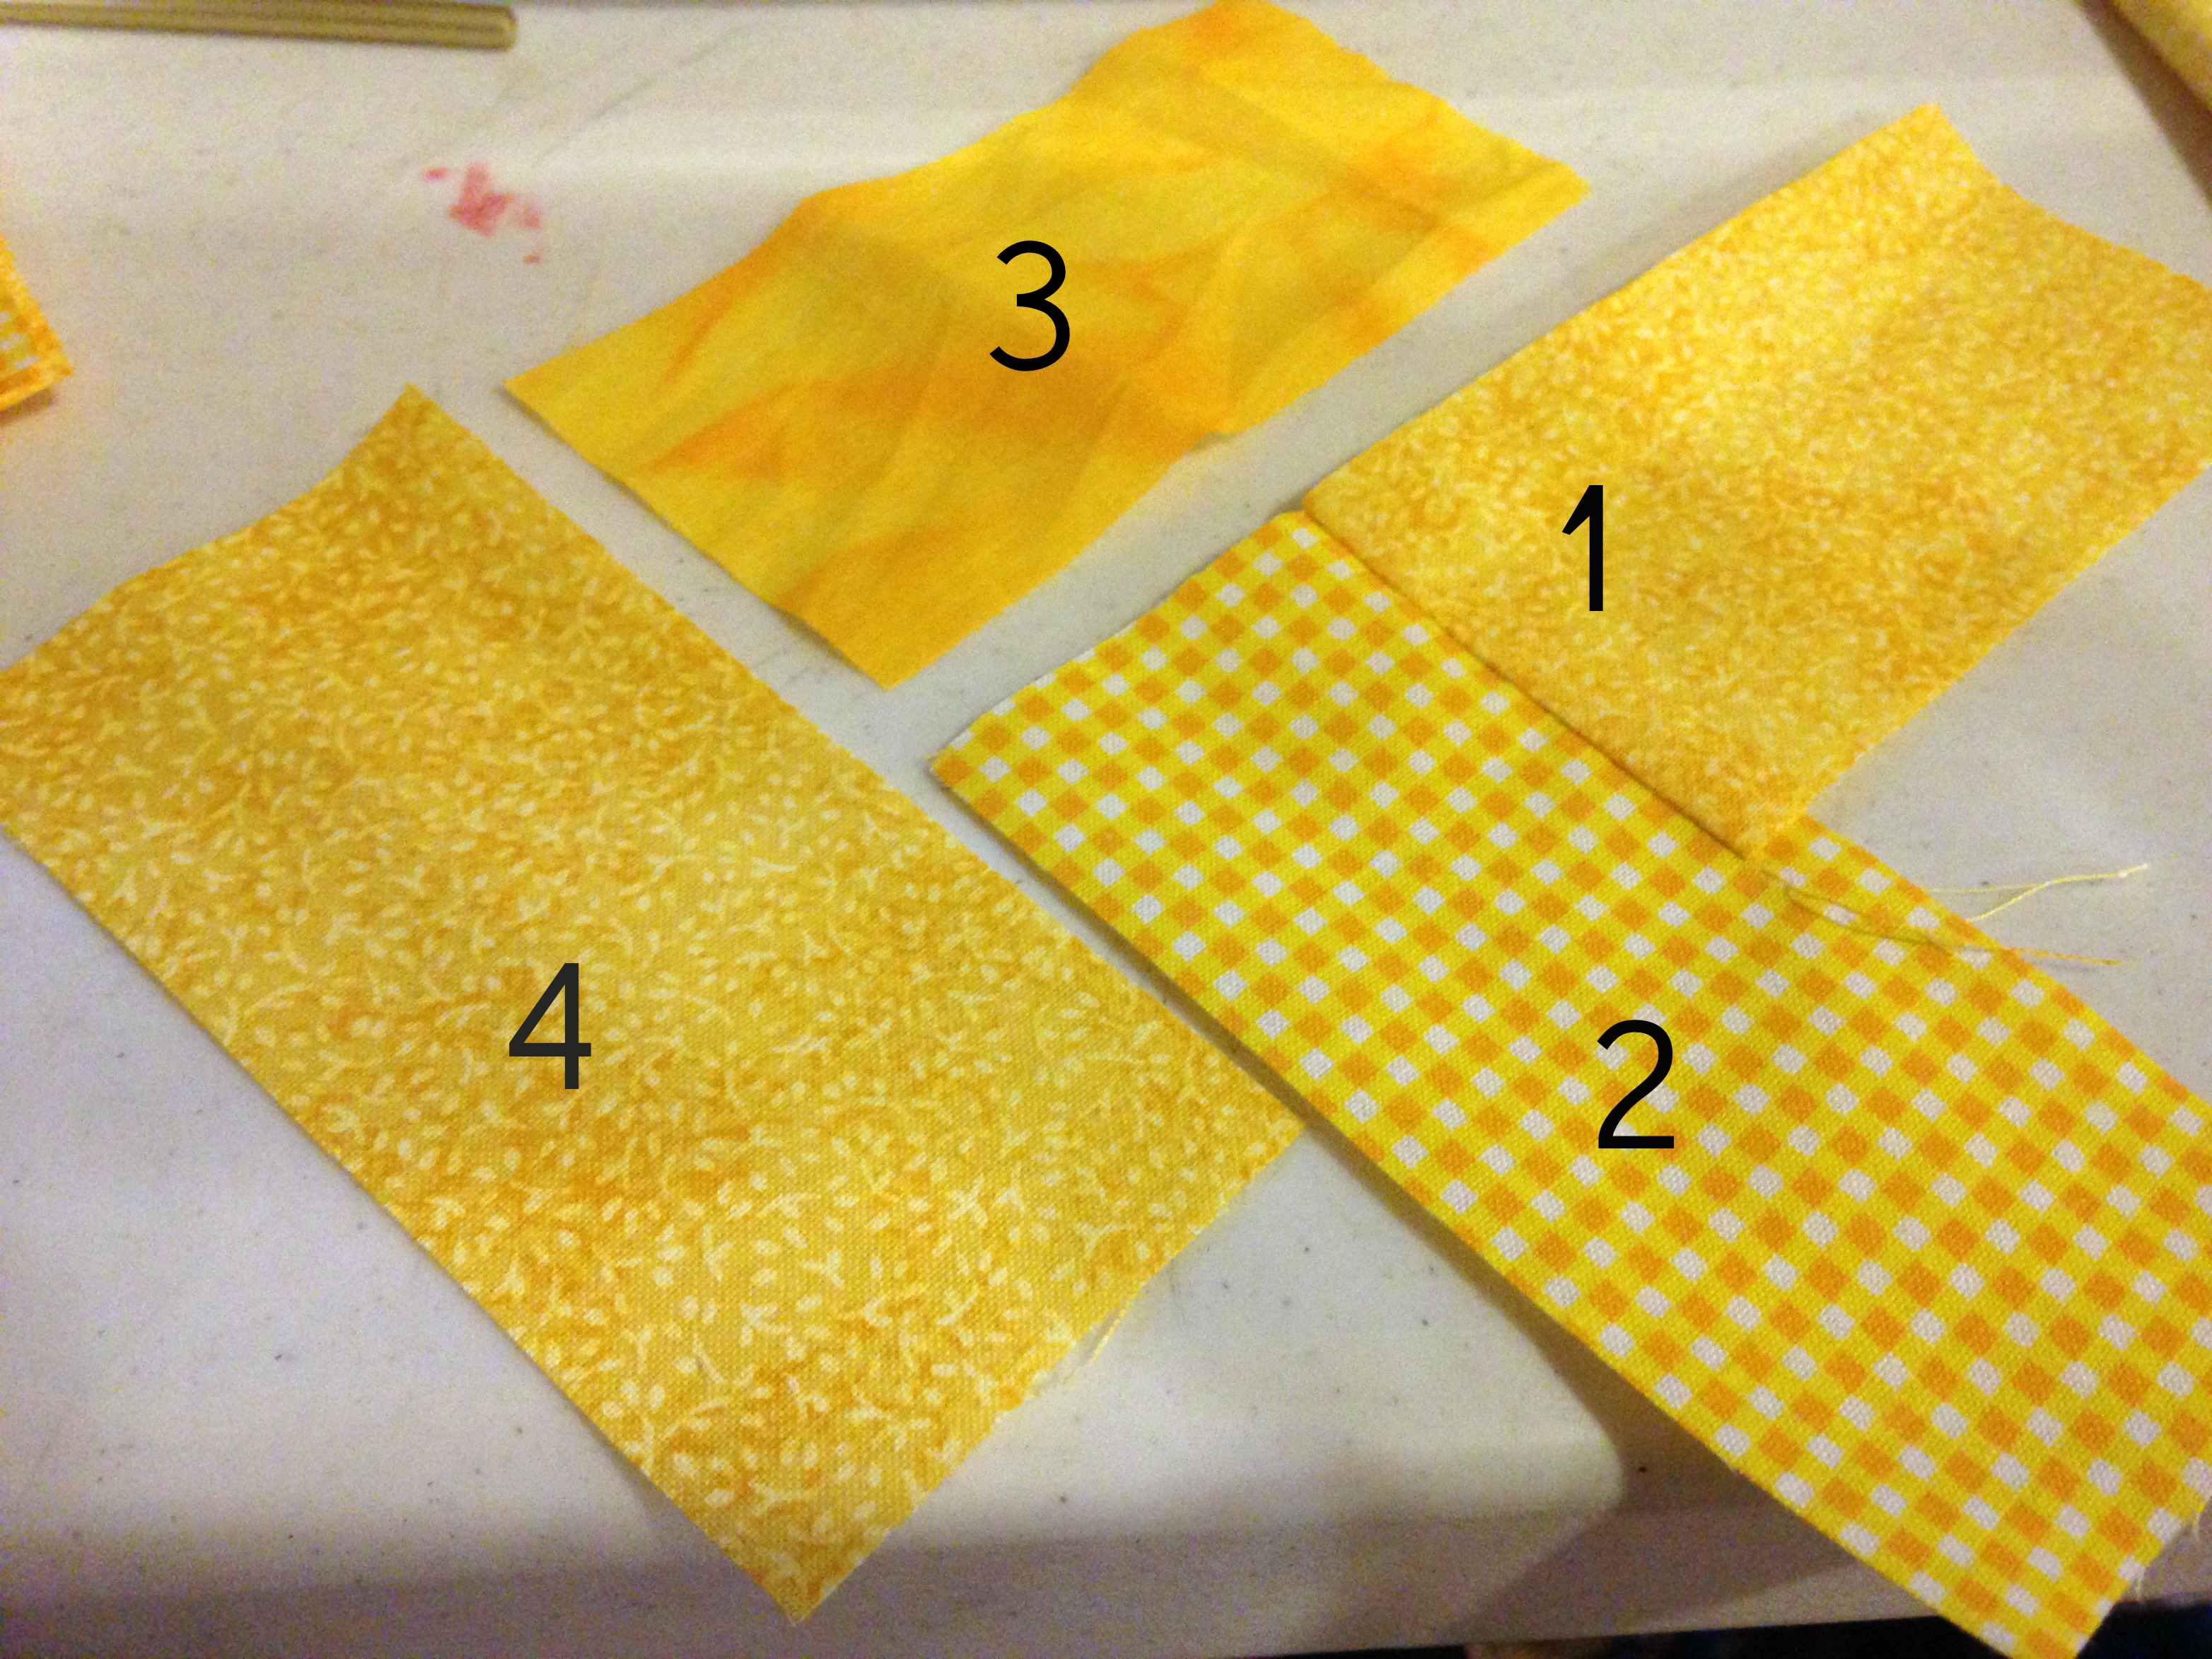
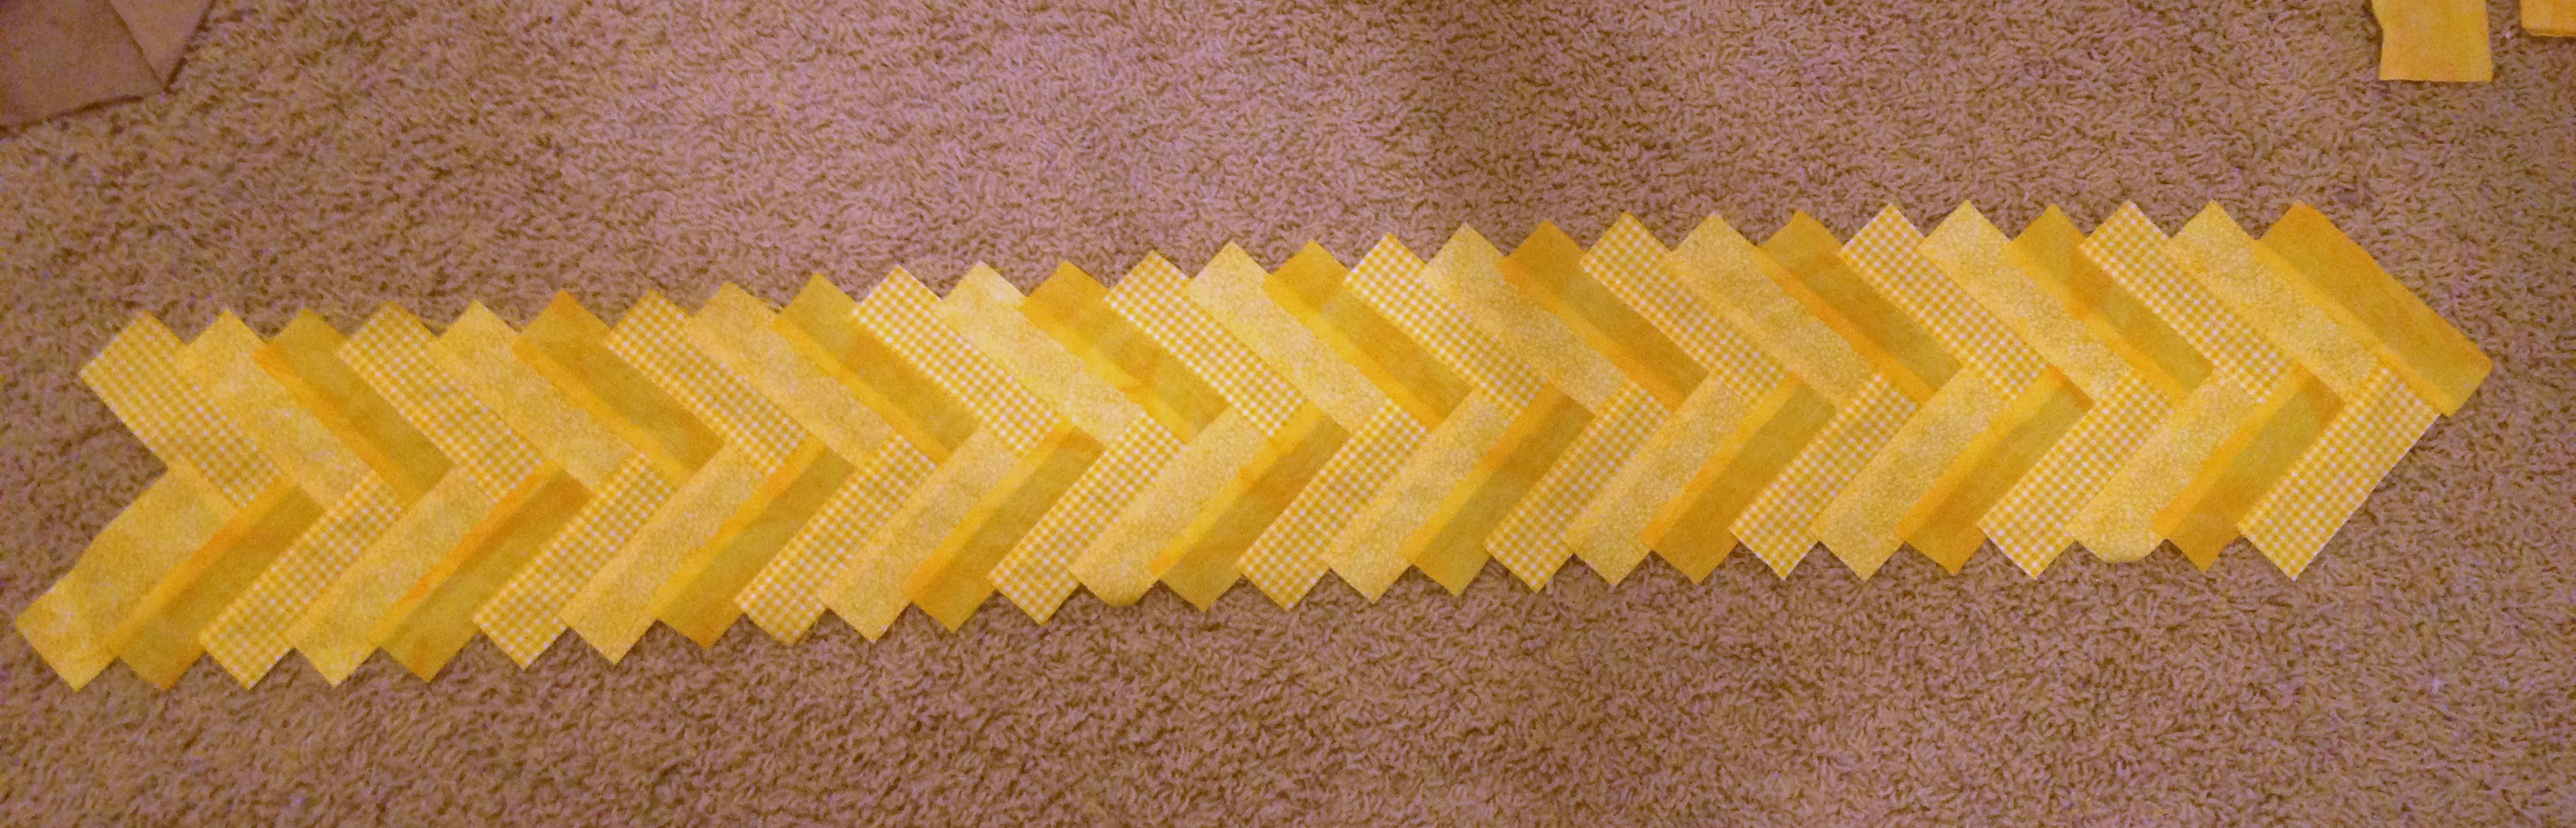
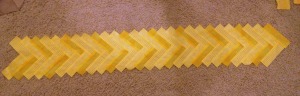
The Rapunzel strap is the only one that is made differently because it is pieced to look like a braid. First you will want to choose 3 of your yellow to be the braid and one for the underside of the strap. Using your 3 braid colors cut 18 rectangles 1 1/2 inches x 4 inches out of each fabric. Sew them together as shown using a 1/4″ seam allowance:

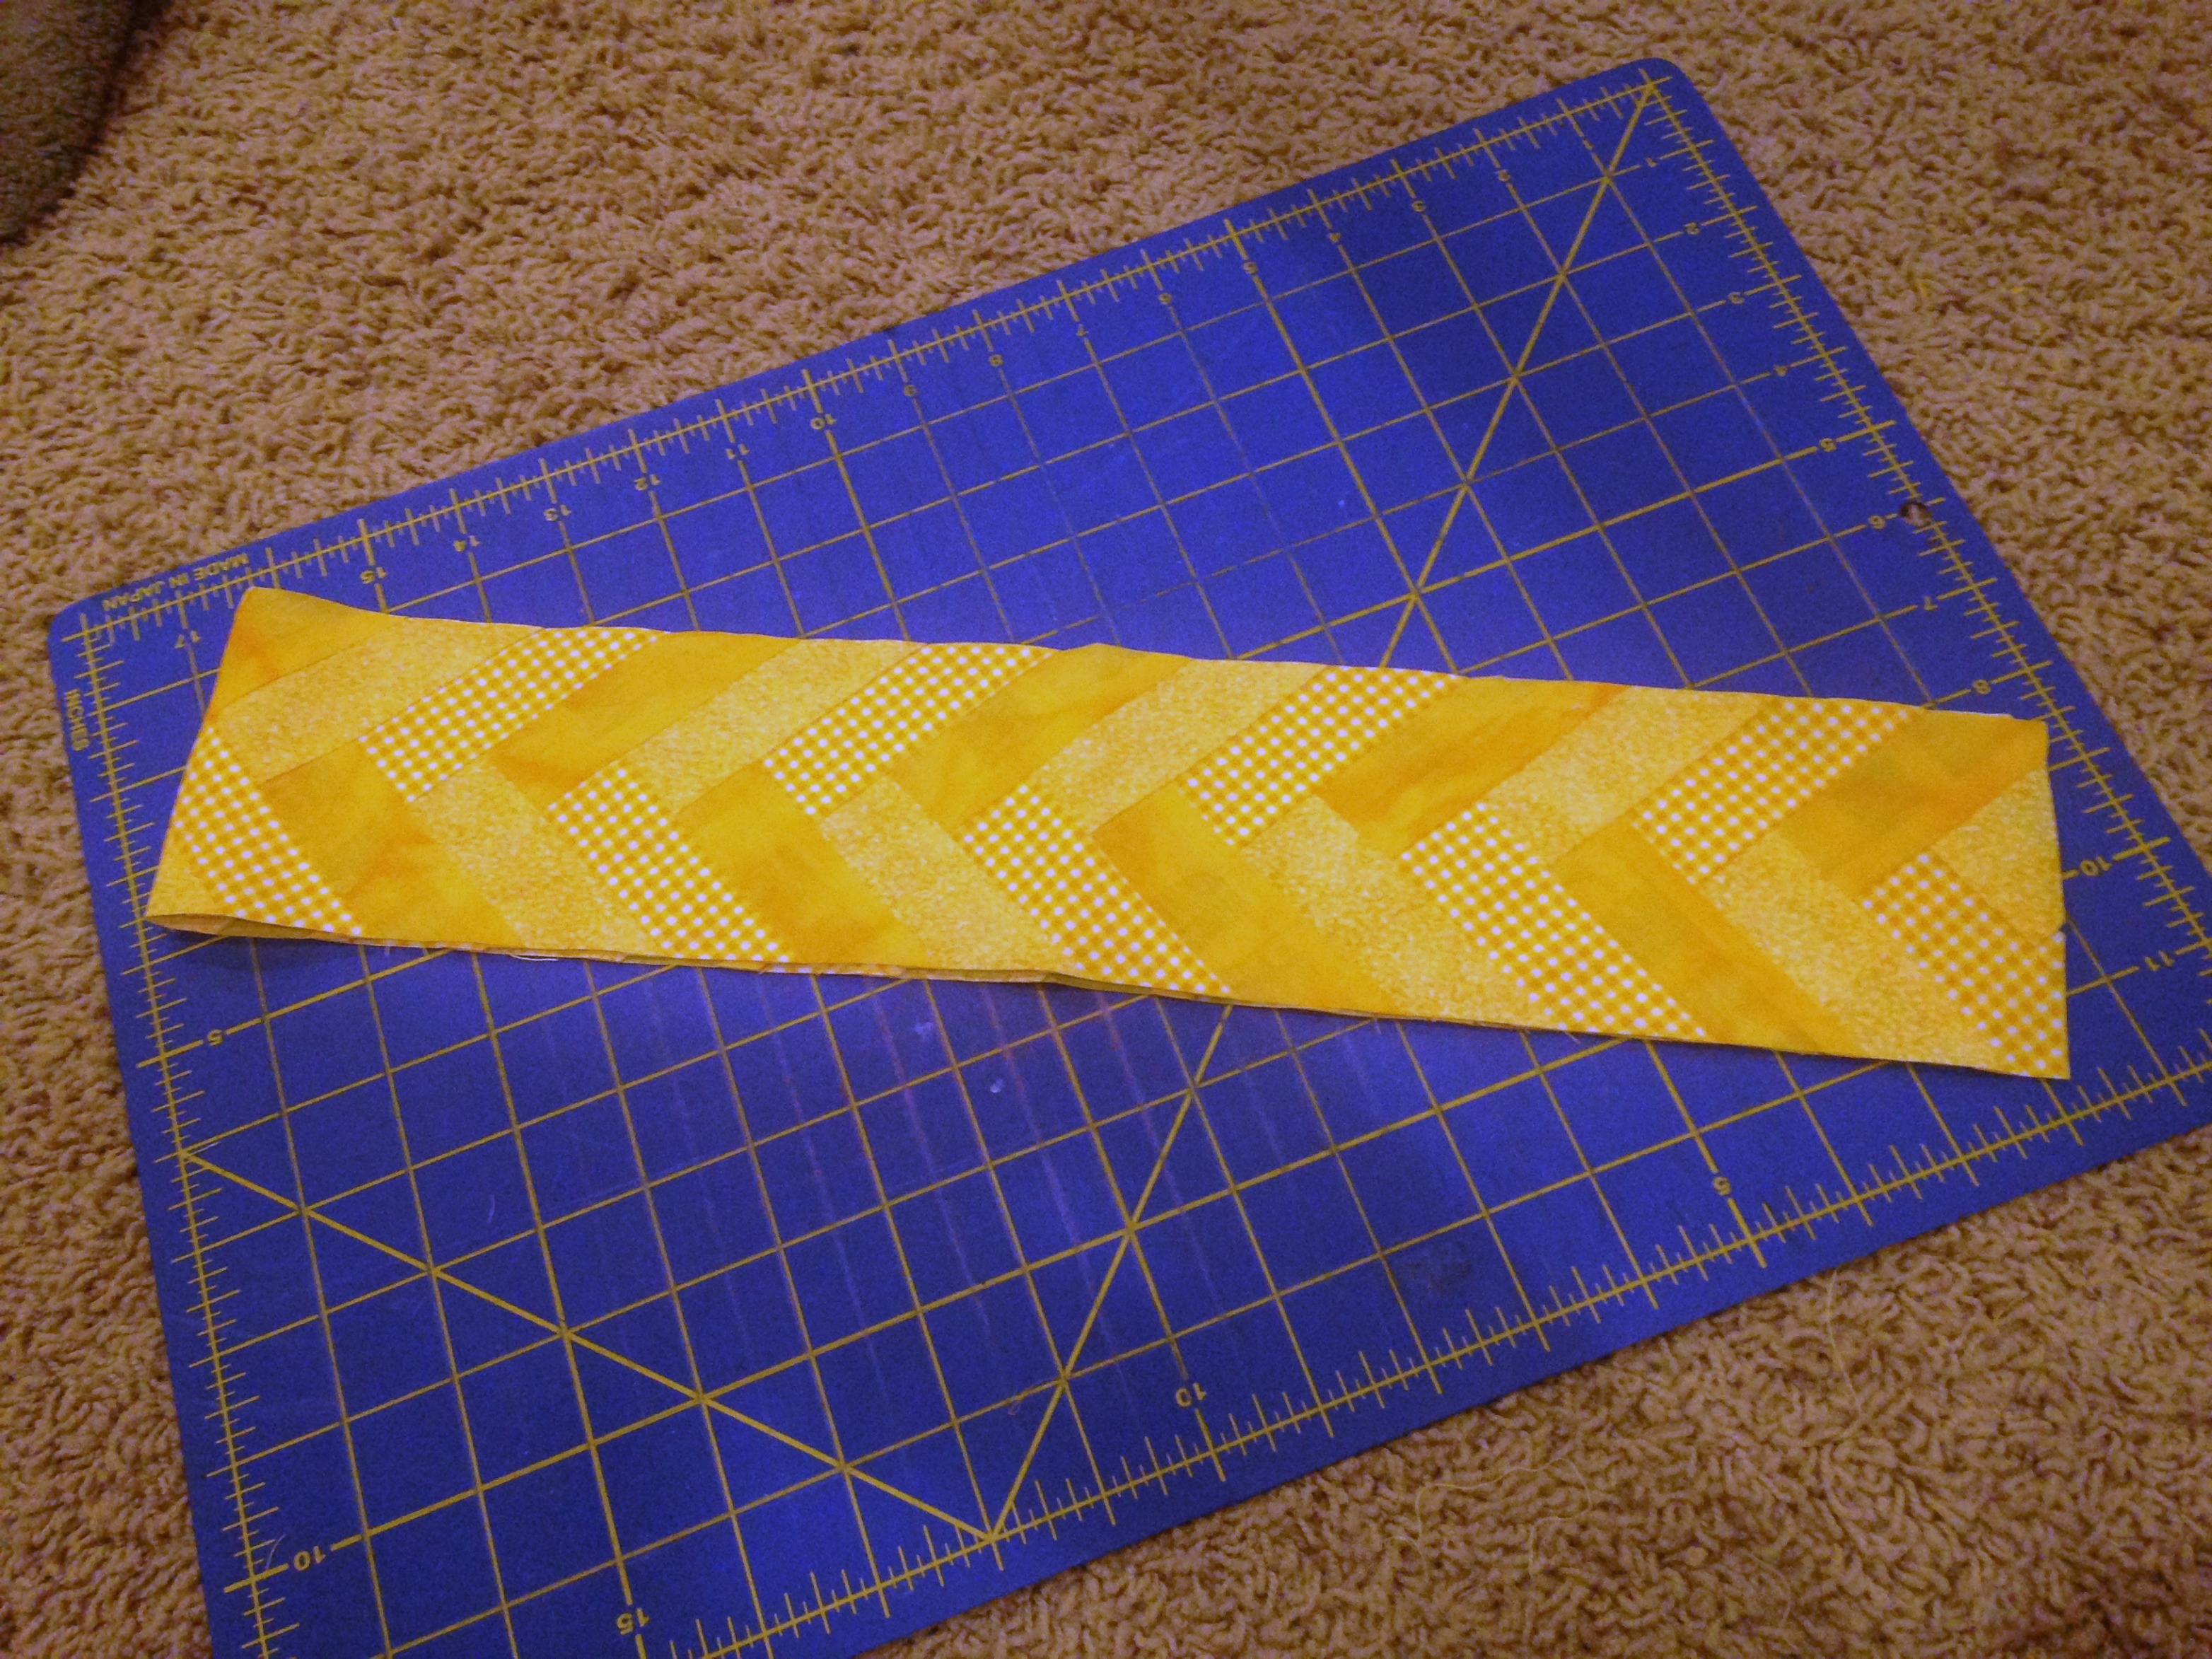
First, sew a short side of 1 to the long side of 2. Then a long side of 3 to he short side of 2 and the long side of 1, and so on until you have used all of your strips. Always use your strips in the same order, if you have colors a,b and c it will always be a,b,c,a,b,c. You will end up with a strip that looks like this:
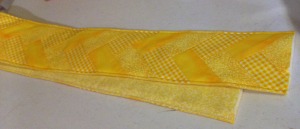
Trim the two short ends so that they are straight. My strip was about 36 inches long after trimming. Now trim the long ends so that your strip is 3 1/2 inches wide, being sure to center your braid when you trim it.

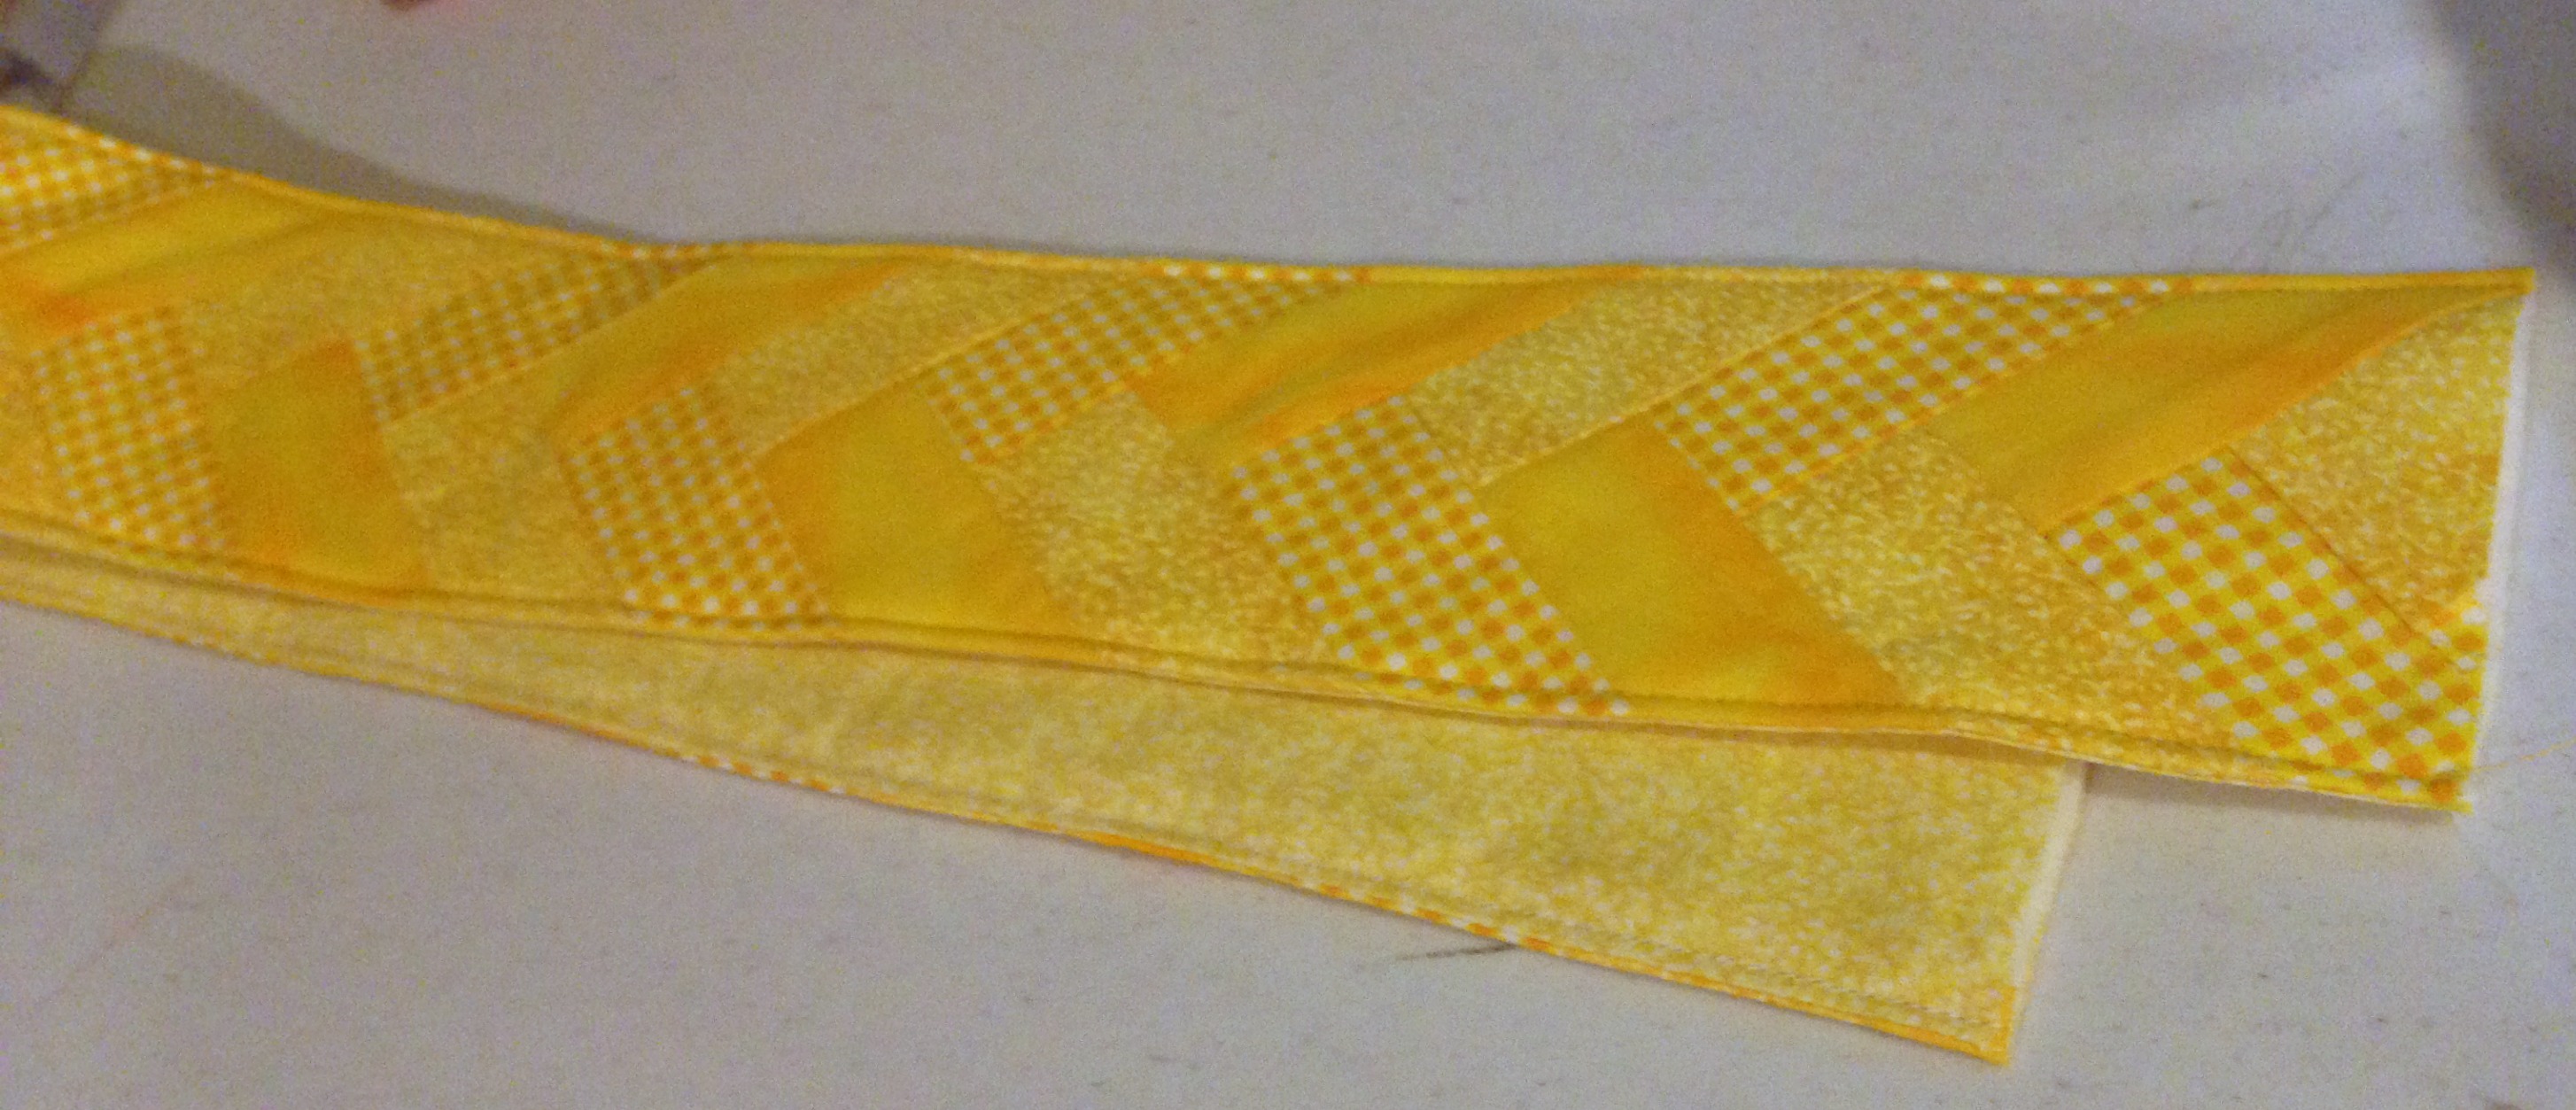
Cut your other yellow strip to 3 1/2 x 36 inches (or the length of your braid. Layer the yellow strip right side up, the braid right side down and the batting and sew the long edges. Turn, press, and topstitch.
Spiderman and Ninja Turtle
Cut 2 strips 3 1/2 x 36 inches. Layer the strips and the batting and sew the two long sides. Turn, press and topstitch.
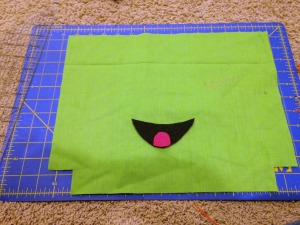
Body of the Bag
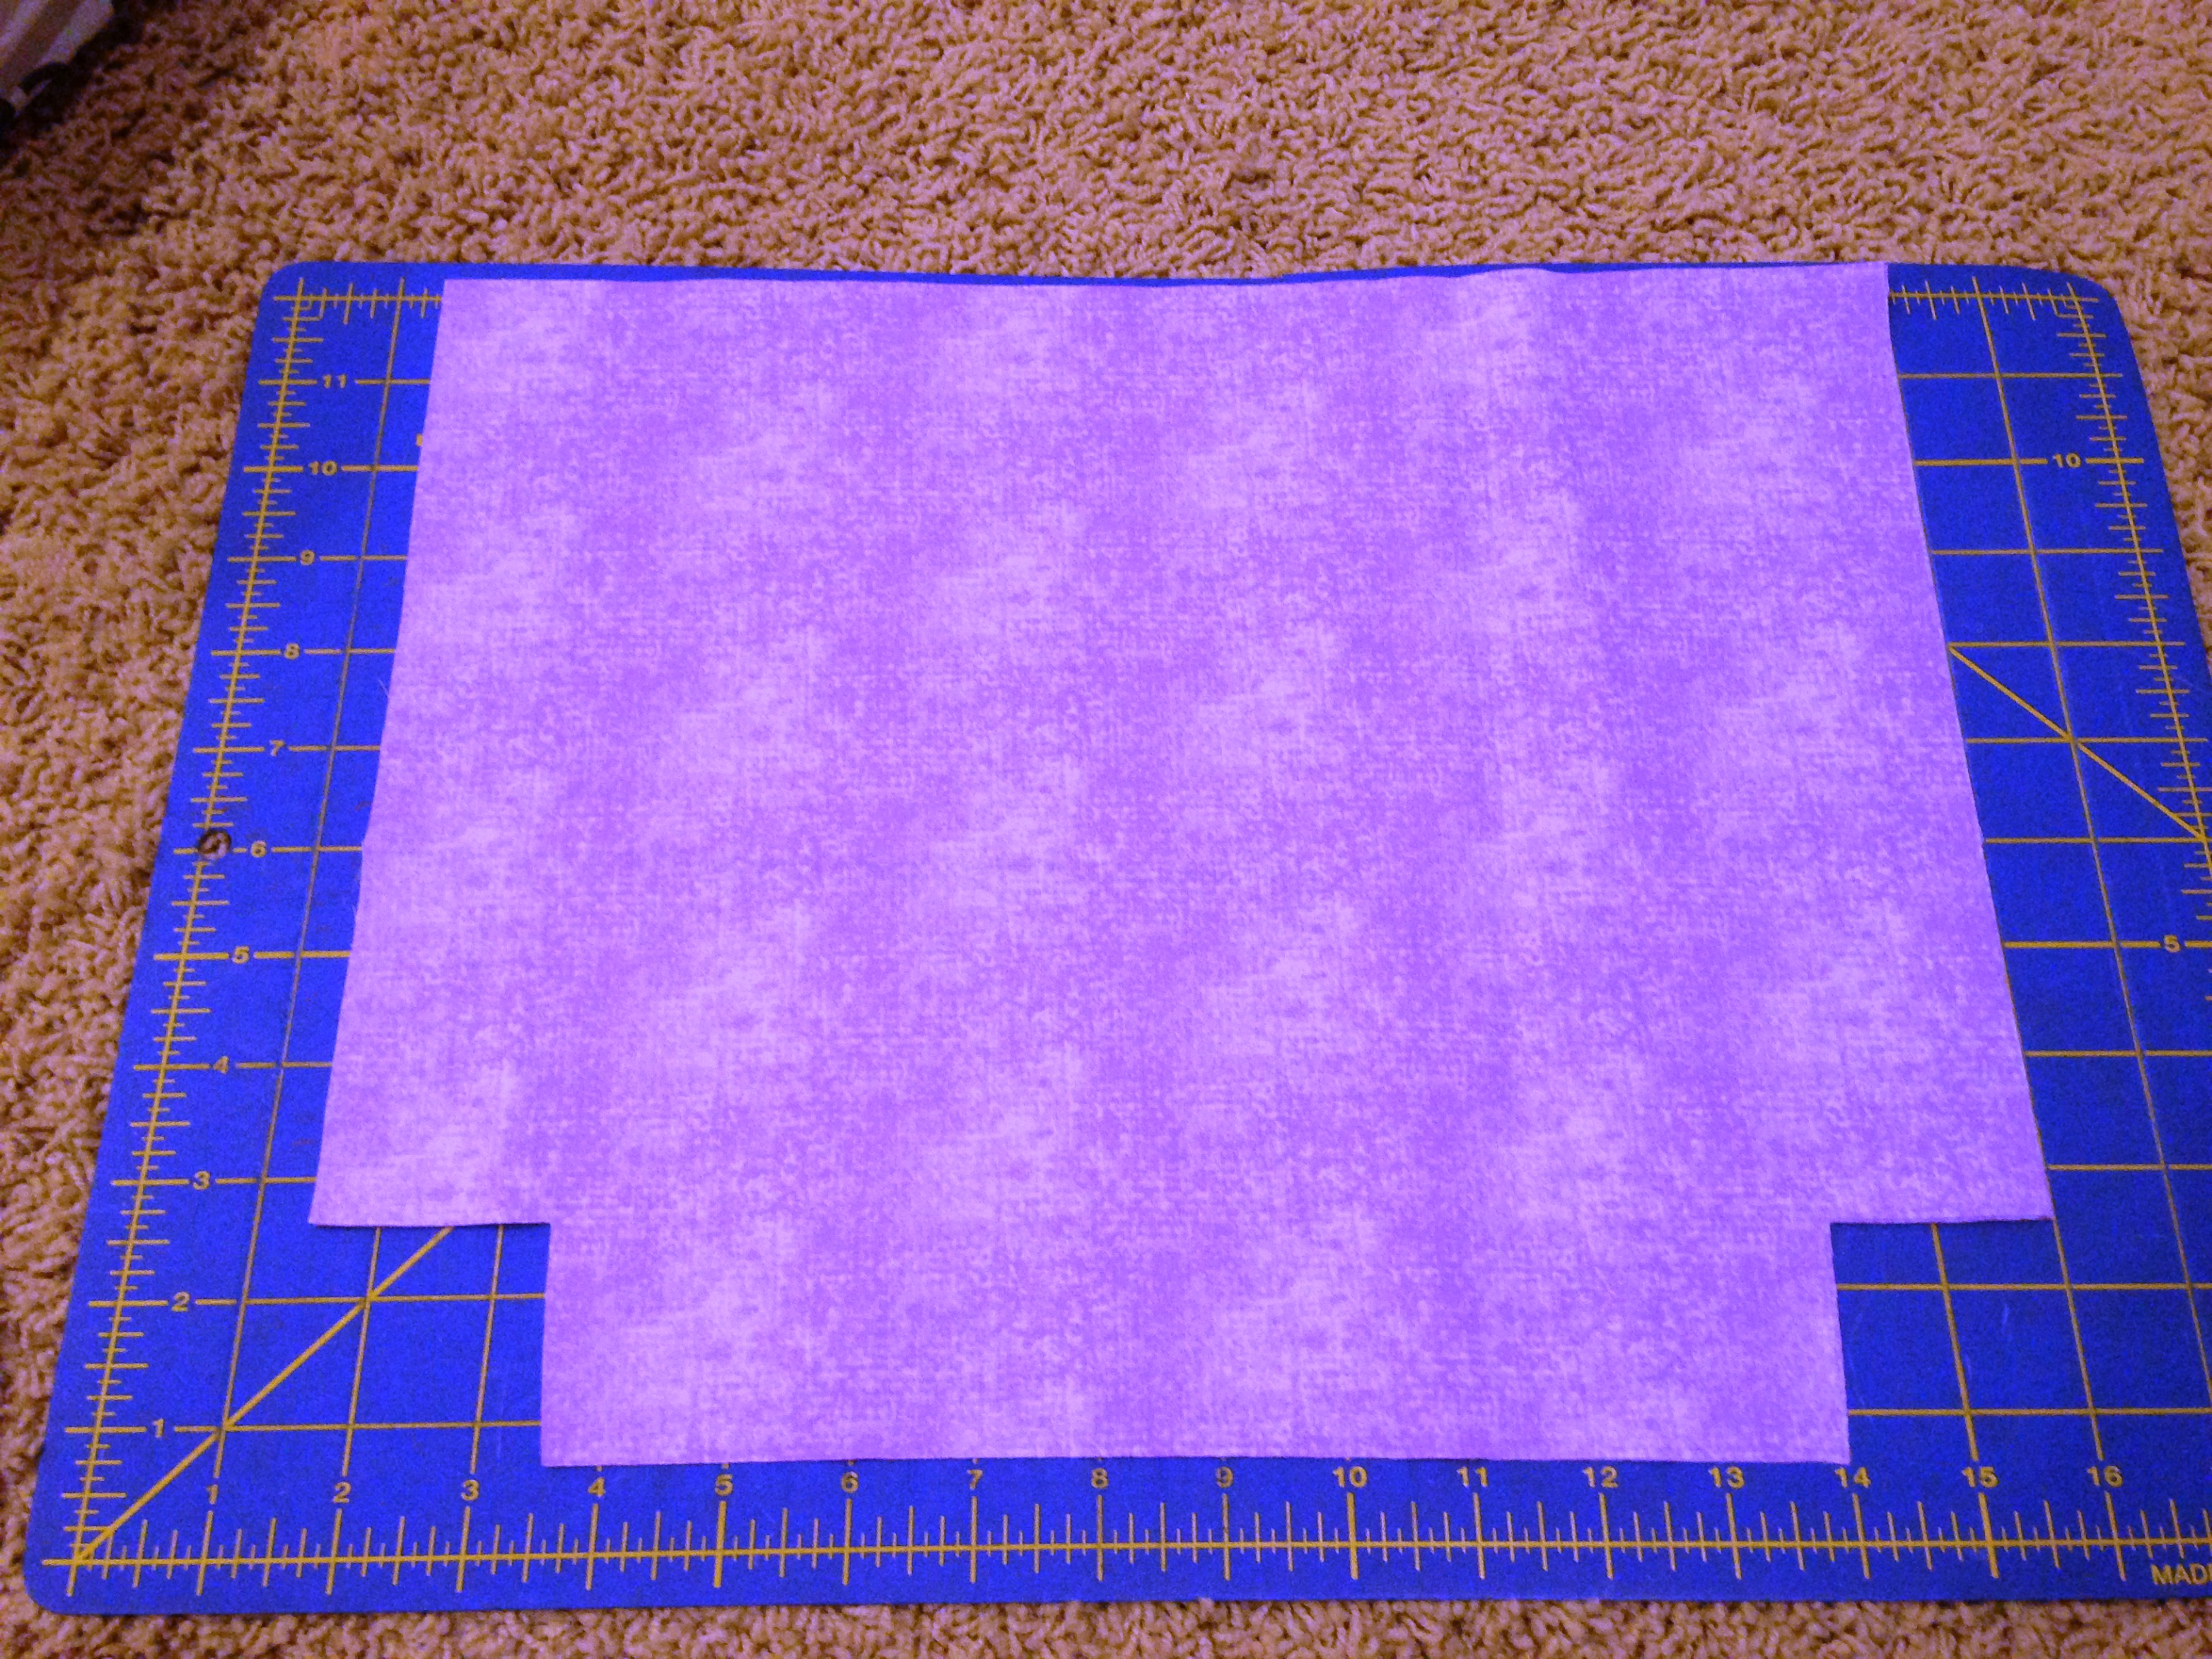
For each bag cut 2 from your bag fabric and 2 from lining fabric 14 1/2 inches x 11 1/2 inches. the 14 1/2 inch sides will be the top and bottom of your bag. From the bottom two corners cut out a 1 1/2 inch square. (In this picture I cut 2 inches from the bottom but that was too much and I changed it on the other bags.)

Cut interfacing the same size and iron onto your outside pieces.
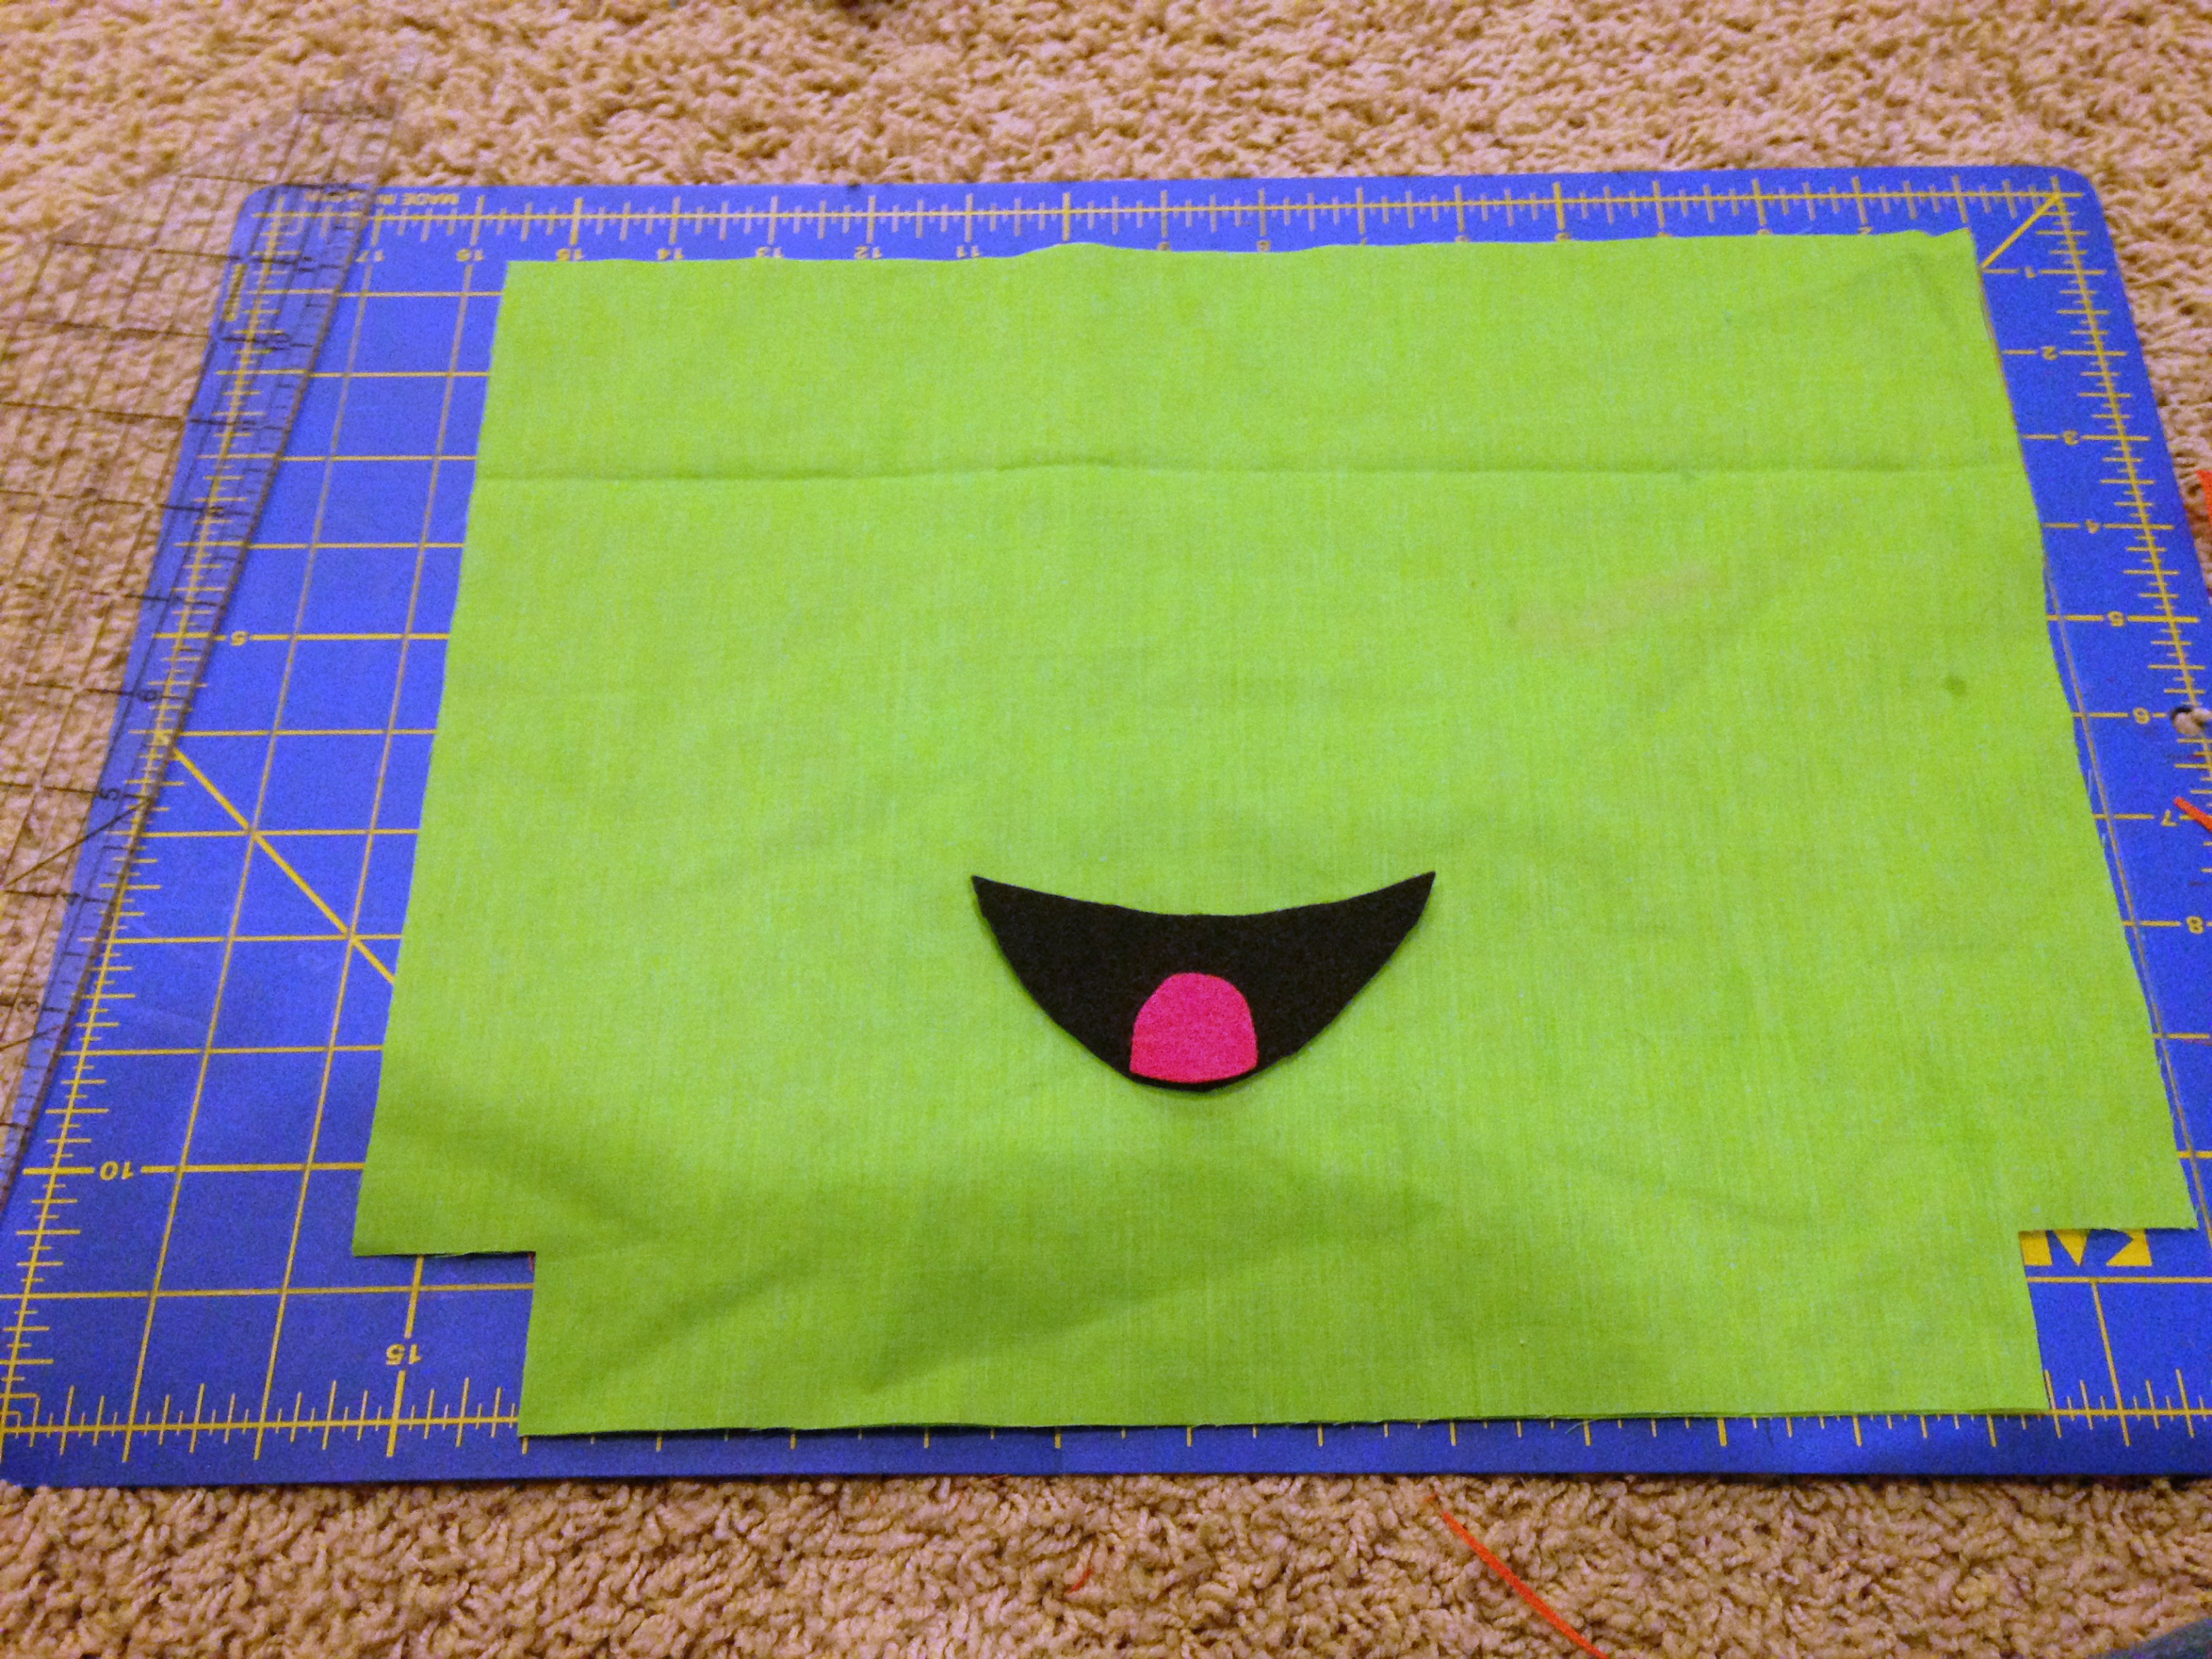
On the Ninja Turtle bag you will need to cut out a mouth, I did a smile with a pink tongue, and appliqué it slightly above the corners that you cut out, but close to the bottom of the bag so that it will not be covered by the flap.
Sew the sides and bottoms, Fold the bottom corners so that the side and bottoms seams match and sew the corner seam. Do this on both the outside and the lining but on the lining leave a hole in the bottom seam for turning.
Assembly
You should now have your flap, strap, bag and bag lining all sewn, now we just need to put them together.
With the outside of the bag center the straps on the side seams right sides together and pin. Center the flap between the straps on the back of the bag, right sides together and pin. Now insert all of that into the inside out lining of the bag, match side seams and pin.
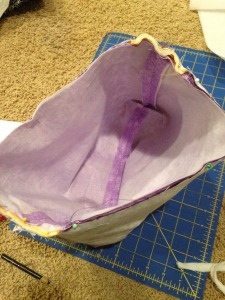
Sew all the way around the top of the bag. Turn through the hole in the lining. Press, topstitch, sew the hole in the lining closed and your bag is complete.
There you have it, a perfect sized swag bag for kids. Thanks so much for reading, and geeky crafting!
Like this:
Like Loading...